
How to decorate above kitchen cabinets? I get asked this question from time to time and today I thought I would share some ideas I have on the subject. First off, please know I am not a professional designer and these tips are fully my own.
Honestly, there is no right or wrong way and almost anything goes. In other words, you do you! You live in your space so whatever you love go for it.
But if you really want others to love it too, I do have certain guidelines I suggest when tackling the project of decor above your cabinets.
My tips on decorating above kitchen cabinets…..
#1 First off measure the distance between the top of your cabinets and the ceiling so when you are out shopping or thrifting for pieces you love you know exactly the size you cannot exceed. But first, always look for things in your own stash from around your home that you might want to use. I personally keep a small stash of decor items packed away and therefore I can switch things out easily for a change in my space and not having to buy new each time.
#2 Go with colors already in your kitchen. You do want everything to flow nicely so stay in the same color family. So if you have all warm soft tones like I do you will want to stick with those tones. If you have all bright colors throughout your kitchen then stay within that tone.
#3 Decide on things you love and things that make you happy. Maybe you have a collection of something special or meaningful to you that you would love to showcase? Such as a collection of white ceramic pitchers stashed in the basement because you have no place for them. Or a collection of vintage items for the kitchen like a vintage sifter, strainer, or grater, which are all kitchen related. Other ideas are trays, platters baskets or a bunch of faux plants, etc. Any of that would look so cute above the cabinets. But be sure that decor relates to the whole style of the room.
#4 If you have a specific theme in the kitchen then by all means stay with that theme. Some will do all farmhouse items such as decor that has animals like pigs, cows, chickens or roosters on it. While others like displaying blue and white chinoiserie porcelain pieces. So what you have going on in the rest of the kitchen should all match to the top of your cabinets.
#5 Always, always remember less is more. So group 1-3 things together and not just fill up the whole space above your cabinets. I personally like the more simplistic approach rather than cluttering them up. Just as the top of my counters are more simple I follow that above my cabinets. But if you are only displaying a collection of something such as all baskets, vases, wine bottles etc… then go ahead and fill it up. That will still look great because its all in the same design theme.
#6 If you have staggered cabinets with different heights, no you do not need something on every cabinet.
#7 Remember anything above the cabinets will get very dusty and greasy if you cook a lot. Seriously how the grease gets up there is crazy but it does and things can get really scummy. So you want to be able to clean everything a couple times a year. Maybe keep that in mind when buying things if it can be cleaned or if its cheap enough to replace when it gets out of control.
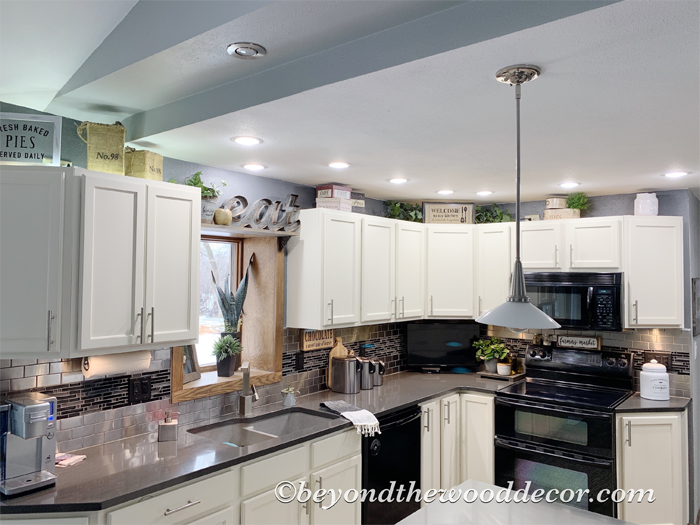
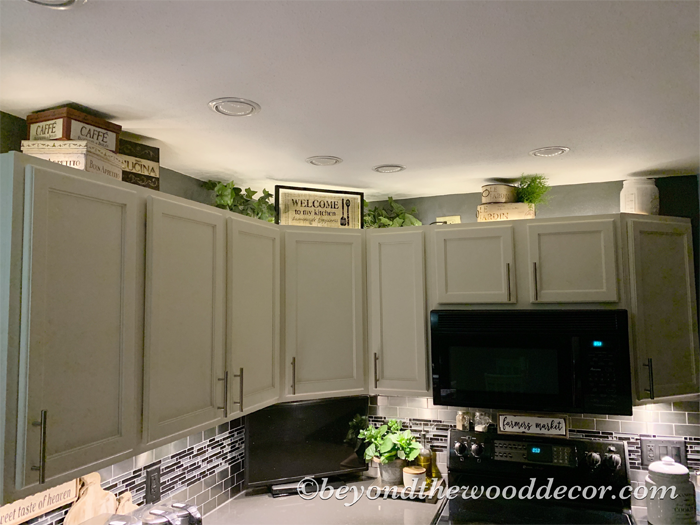
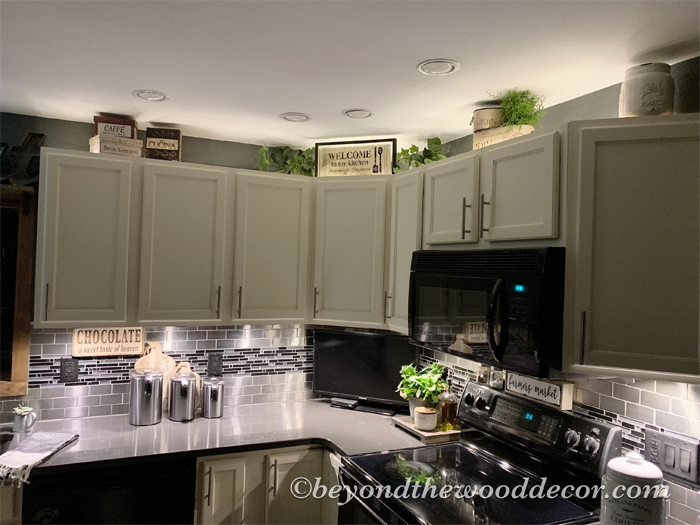
Above my cabinets….
I live in a 60+ year old house so my ceilings in the kitchen are not very big. Therefore, I only have 8″ between my cabinets and ceiling. So my space is very limited.
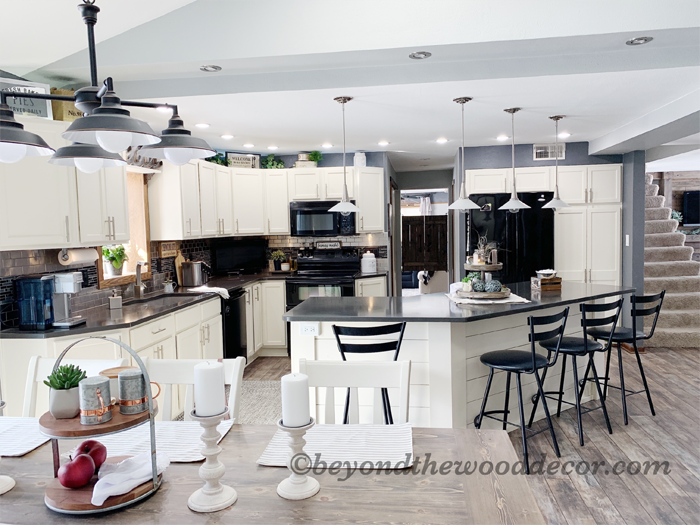
Plus my cabinets are 17 years old and back then everything was hung in a straight line. They were just coming out with staggered cabinets with different heights but I did not jump on that bandwagon because pricing was not in the budget. But I do love that look but you need to work with what you have right?! The tips above will certainly apply to all cabinets whether yours are staggered or straight across.
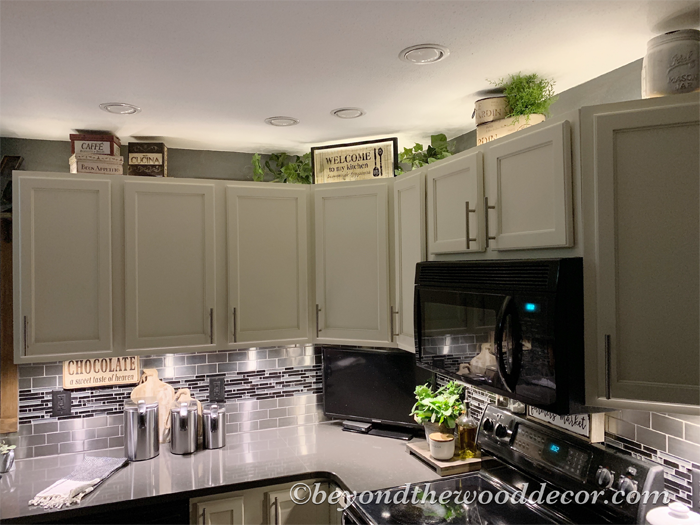
I really have no rhyme or reason behind any of my choices. I picked these items just because I love them and they flowed in color so nicely with the soft muted tones and kitchen quotes. I did not like my cabinets being bare so these pieces were perfect giving that dead space some warmth and a finished look.
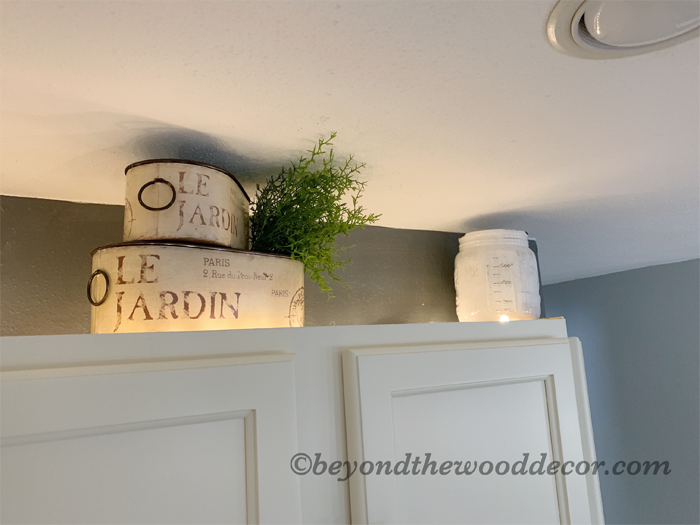
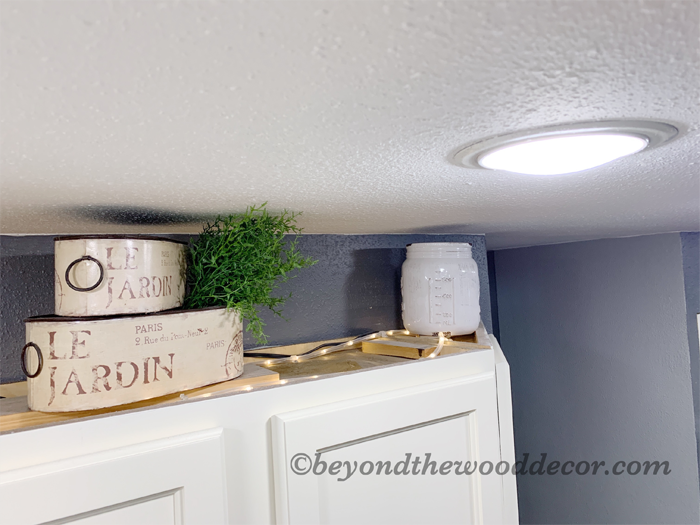
These metal tins are more french but I loved them because they looked vintage and had a nice warm tone to them. “Le Jardin” in french means “the Garden” so of course after stacking the tins I had to add some faux stems to one for some added interest to my garden, lol. Plus they kinda looked like an herb plant so that was good for me!
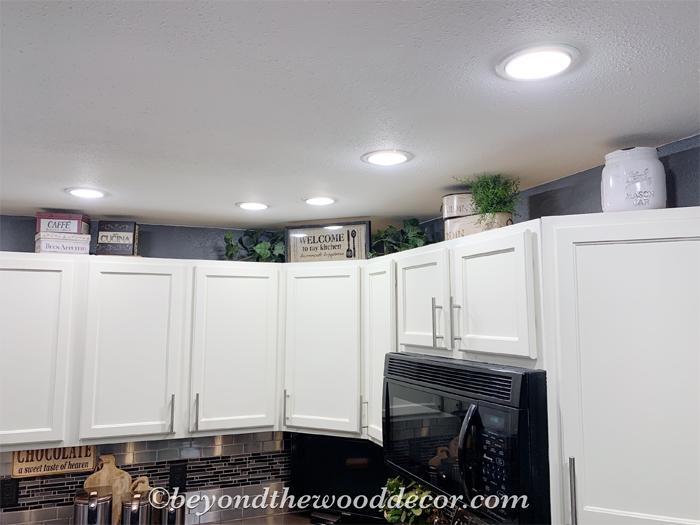
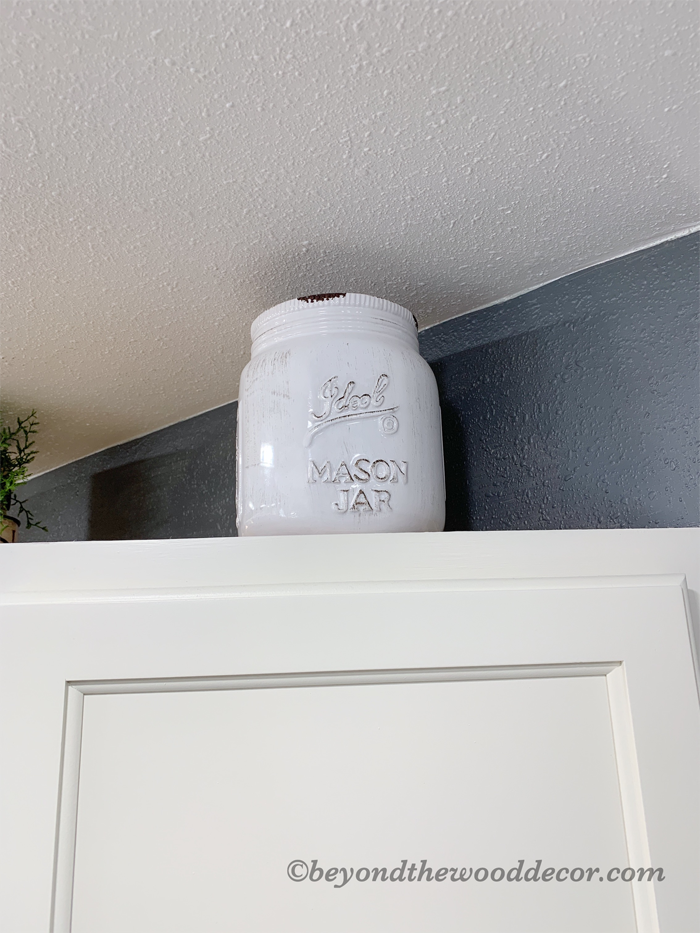
On the corner a simple white mason jar just because it fit perfectly and who doesn’t love mason jars, right! You can also now see the true color of my cabinets which is a cream and the mason jar is white.
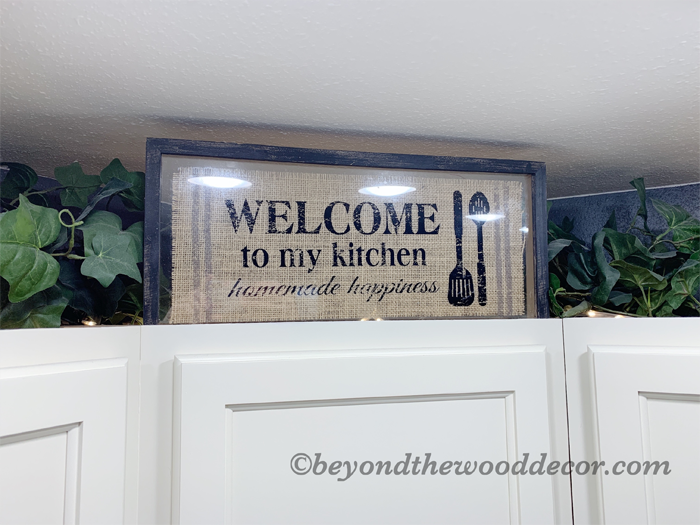
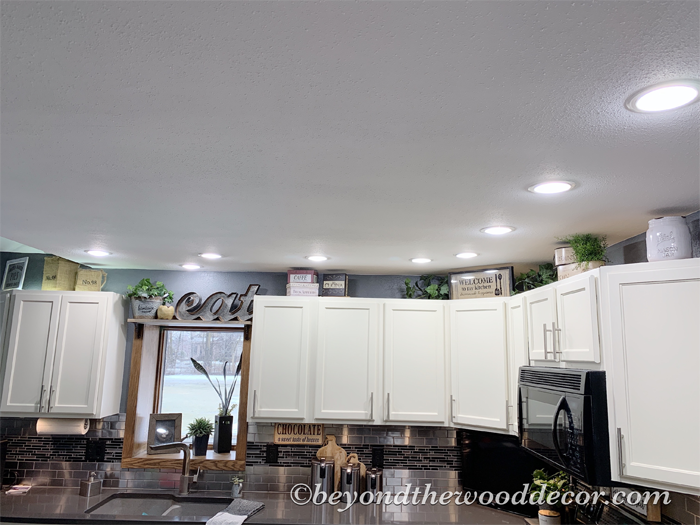
In the center cabinet I have this welcome to my kitchen sign that I have had forever and very soon I plan on changing it to a different sign that I will be making. But I love it on burlap behind glass for that rustic, farmhouse feel. Because that corner is so big I did add some faux ivy vines which also brought in that pop of green color. Yes, they do get dusty but they are so simple to clean. Just take them down and rinse under running water and just air dry. In the summer I literally take them outside and hose them off and air dry outside, so easy peasy.
Just like these two vases on the far corner wrapped in burlap and two different sizes just fit so well. To clean them from dust I simply vacuum them!
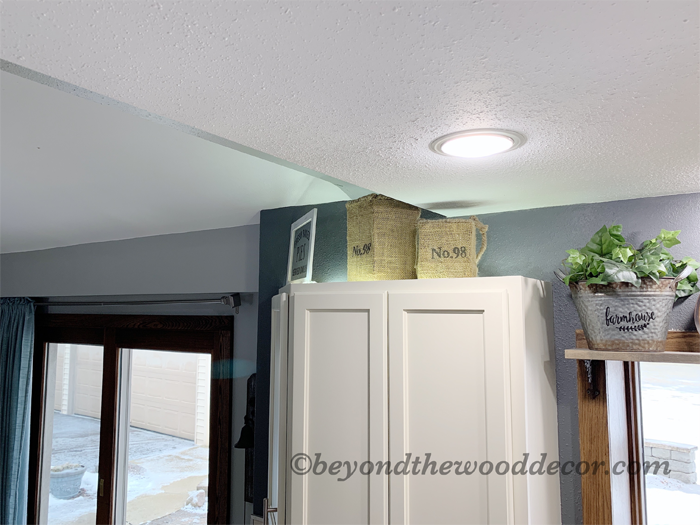
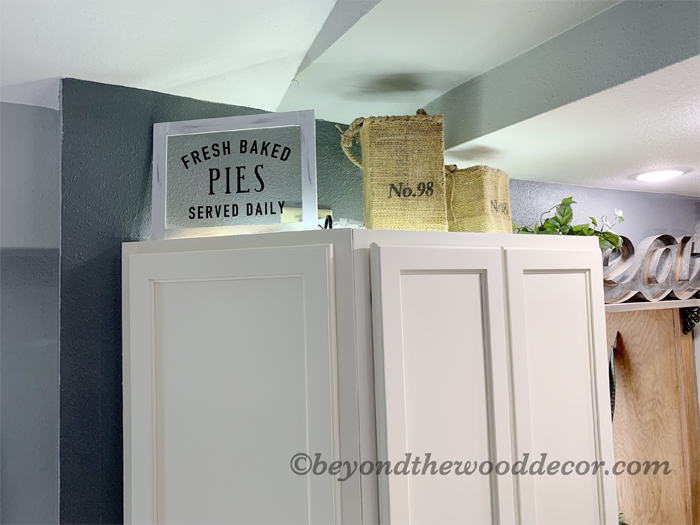
When hubs remodeled our kitchen in 2002 he added a dinette and office with cathedral ceiling so therefore this one corner only has a little higher area where the taller vase did work. The ” Fresh Baked Pies” sign I purchased from World Market years ago but I see they still have them but changed it ever so slightly. I love that sign and you can get it here. I did remove the wire hanger from it and I love it on this corner.
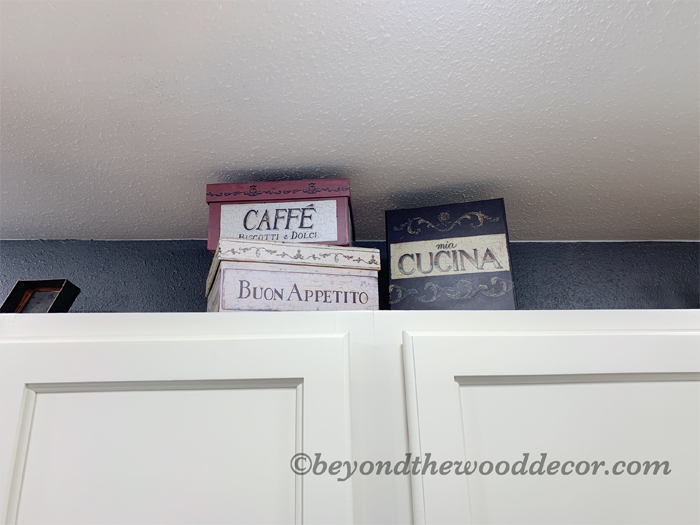
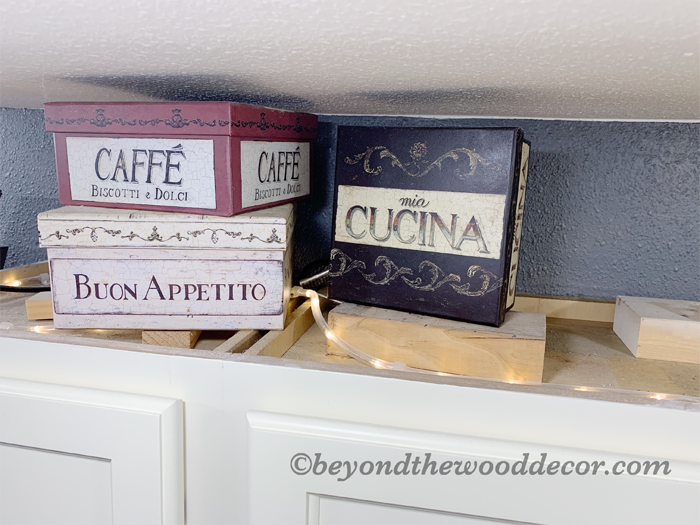
Lastly, these simple boxes I found many years ago and yes they are covered in italian words but hey, they are kitchen quotes and the colors are gorgeous so they work, right?! The far one on the right in case you didnt know “mia Cucina” means “my kitchen”. So fitting right! I love these boxes and just stacking in a cluster like this gave a nice visual for that end cabinet.
Tips for raising items up…
When you have cabinets like me that have a lip on them and are not flat on the top often setting something up there the bottom gets hidden from the lip. My tip for that is so simple, just add a small board like a 1 x 4 or 2 x 4 depending how tall you need something raised.
If you have no wood at home you can get a scrap piece at any hardware store or just come to my house, lol. Seriously just a small block of wood under whatever you need raised up works wonderfully! I used a bunch of them above my cabinets since most of my items needed to be raised to see it all.
Here is above my cabinets and the lip on the edge. So now you can see what I mean about adding a block under things to raise them up. It is very sloppy up there but you won’t see any of that because of that lip on the cabinets.
When hubs remodeled the kitchen he made sure to add outlets up there so we could have rope lighting on top of the cabinets. He also made those outlets work with a switch so super easy to turn on and off and I’d say he is the best!
Nite time pics….
I love the under cabinet lighting and the rope lighting above the cabinets at night. Here is how it looks at night with no lights on except the cabinet lighting. The only thing we need to change yet is the rope lights to a white color instead of the yellow hue they now have. Hubs has them but has not had the chance to change them out yet. We did update the under cabinet ones so the ones on the top will match.
Well friends I hope that gave you some ideas and tips for your cabinets. But seriously there are so many ideas out there but always do what you love.
I hope you have a great week and for any of you looking to update a baby girls room to a big girl room I am sharing my granddaughters room in the next blog post. So keep an eye open for that mid week. It seriously is the cutest ever!
Have a great rest of your Sunday!
xoxox


Looks very nice. Good job.
Thank you Janean, I appreciate it, thanks for following along! 😍
I love how you have done your kitchen! Can you tell me what paint you uses for your walls?
Thank you Mirim. The dark gray is called Dark Ash by Behr and the lighter grey is Classic Silver also by Behr.
Wow! I’ve been searching everywhere for style like this. Great inspiration and beautiful!!
Any tips for how to decorate a cake platter with glass lid when not filled with goodies? It’s so pretty that I love It on my counter but don’t have time to bake constantly lol!
Stephanie, Thank you for your comment and honestly I have “fake” bakery in my covered tray most of the time. I found a really nice real looking cake I keep in it most of the time. Email me and I will get you links and photos.
Awesome hints! Just finished painting my kitchen and am looking for ideas above the cabinets, you have helped me a lot!