
Sharing some love!
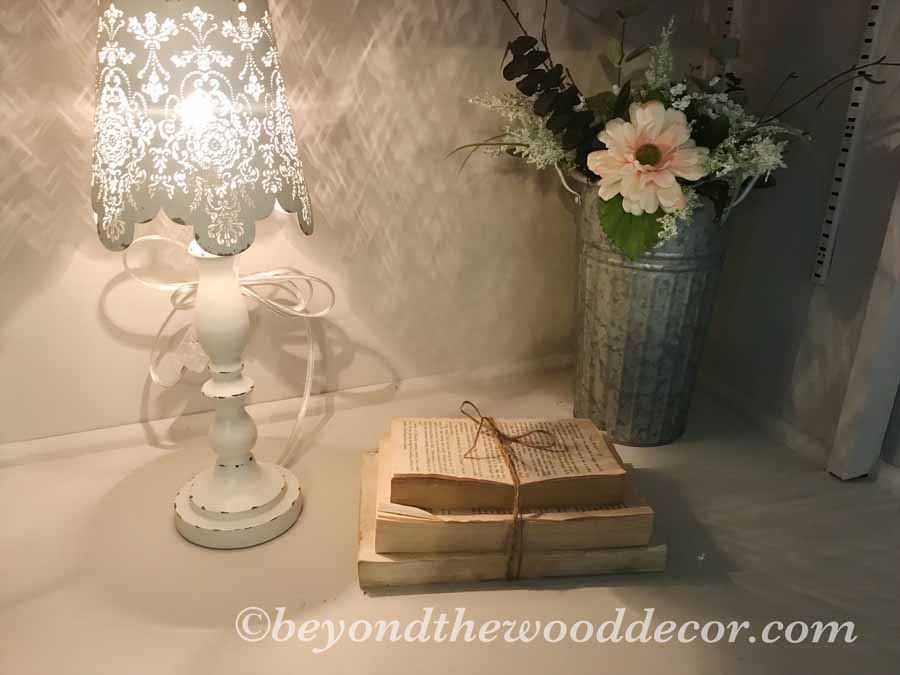
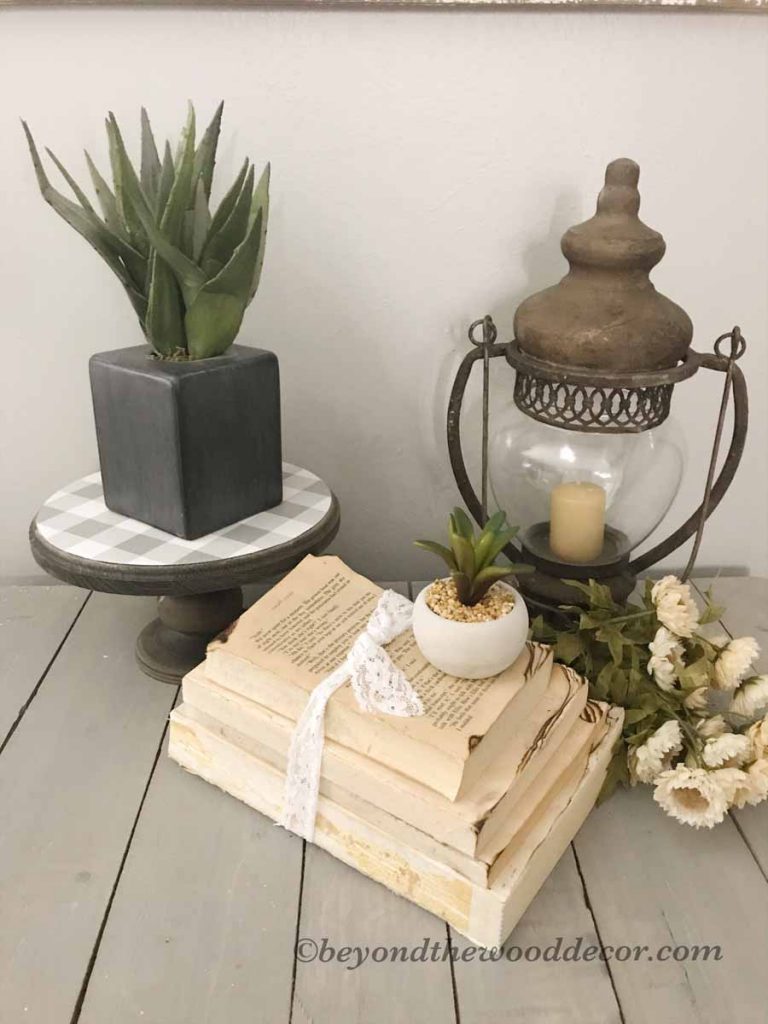
First off I want to start by sharing this photo. It was submitted by one of my dear friends and follower who enjoyed creating her own vintage books from my tutorial found here. I am beyond excited so many of you have tried it and are enjoying my DIY’s as well as other tips for decorating on a budget.
I mean look at this photo, is her decorating spot on or what! Oh c’mon a lace lamp shade….is that just the cutest ever?! I think her vintage books turned out fantastic and styled so perfectly with her other pieces on her shelf.
Lets talk about Buffalo Check
Do y’all know what it is? If not I will tell you and give you a little history on it. Buffalo check is often a two- or three-color striped fabric whose pattern creates large squares of equal size in all directions (as opposed to checked gingham fabric, which has small squares). While it often includes black as one of the colors, black is not required in order to qualify the pattern as buffalo check.
One might ask what the difference is between buffalo plaid and buffalo check. Check patterns are simpler than plaids. They generally consist of two alternating colors, but not always. Checkered patterns are symmetrical, consisting of crossed horizontal and vertical lines that form equal sized squares. Each line is intersected by the same kind of line in equal intervals and widths. There are many different types of check patterns such as Gingham, Buffalo and Windowpane. 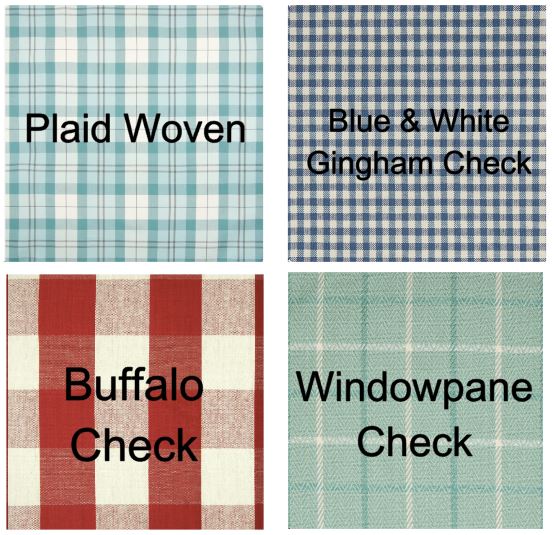
More history on buffalo plaid and check!
Where exactly did the buffalo plaid phenomenon come from? When it comes to the classic red and black buffalo plaid, it seems this pattern has prevailed for a very long time.
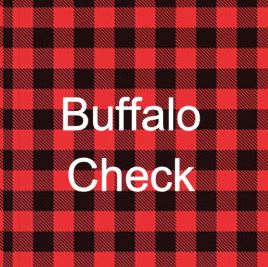
Woolrich Woolen Mill began producing the Buffalo Check shirt around 1856, which means we’ve been rocking this plaid for over 150 years. At its inception, the shirt was an instant hit with workers and outdoorsmen braving the harsh elements and has been in the Woolrich line ever since. Legend has it that Woolrich’s designer of the distinctive style owned a herd of buffalo and that’s how it got its name. The company has an amazing clothes line that can be found here.
The wool found in the very first shirt is still being produced in the very same factory, which happens to be the oldest woolen mill in the country. YAY USA-made! The entire story on this 8 generation family owned business was so interesting to read.
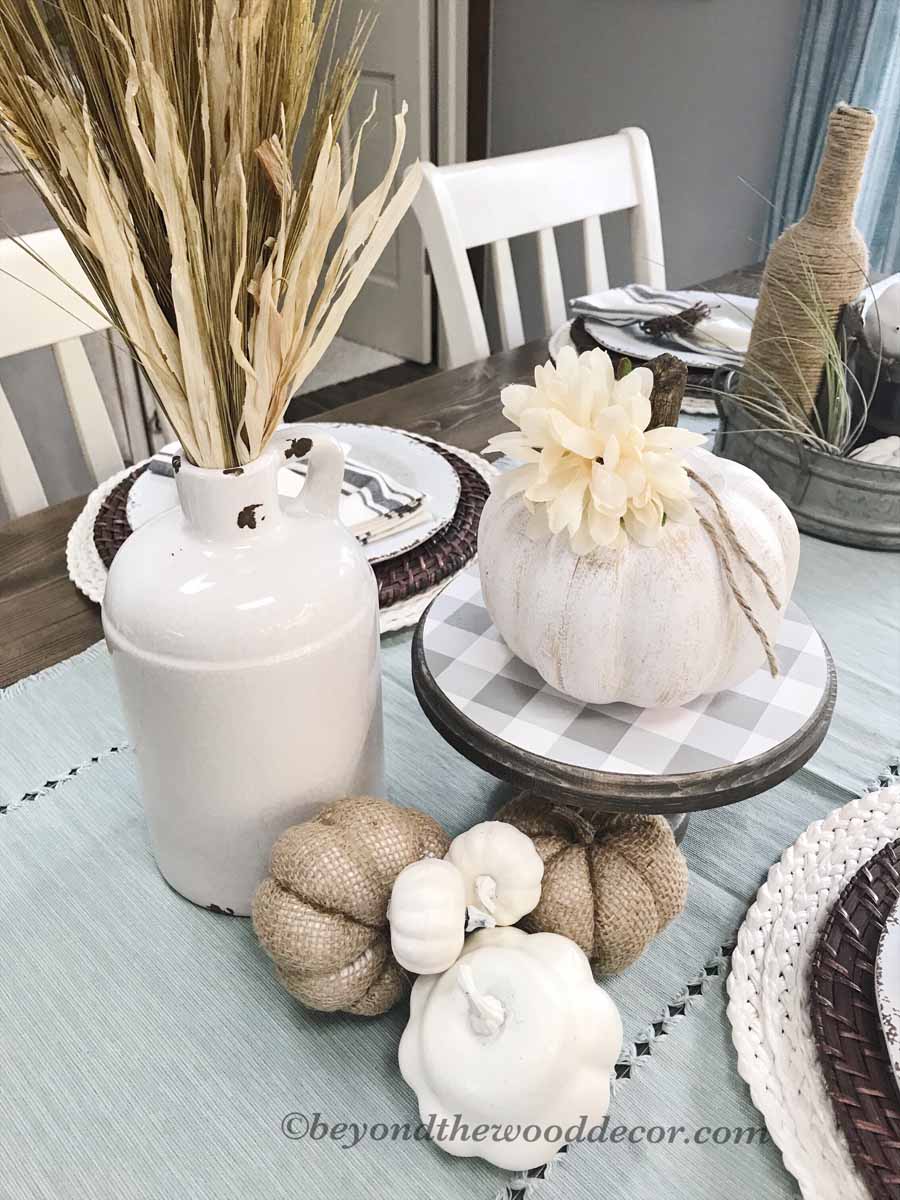
There you have a little history lesson for the day, lol. Sure doesn’t look like buffalo check will ever be leaving. Since this fabric is so timeless you can now find the design in so much home decor. Hence my new stand I just created.
Onto the DIY Buffalo Check Stand!
Moving on my friends today I am sharing another super quick DIY to make your very own buffalo check stand. As you already know I am a fan of the buffalo check pattern and if you are not you can still make this stand and paint it any color you wish!
This little stand is so adorable to just have different heights in a tablescape or when styling a shelf, entry table, dresser or anything that you are decorating in your home. Just so many uses you may just want to make a few!
Steps to creating….
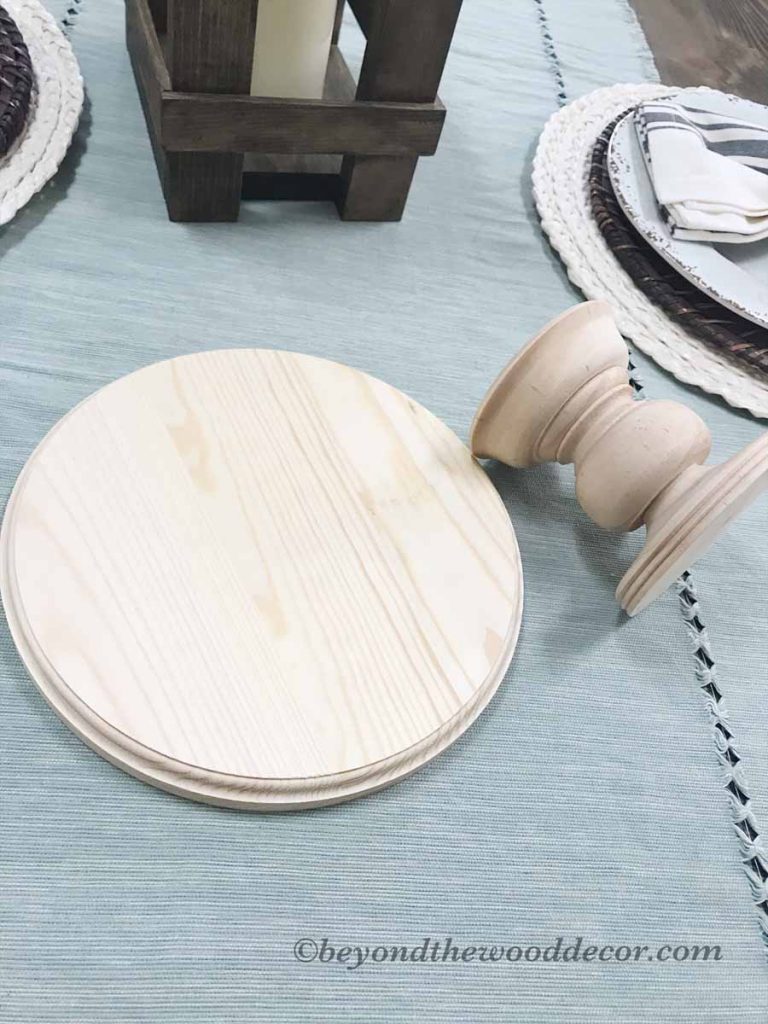
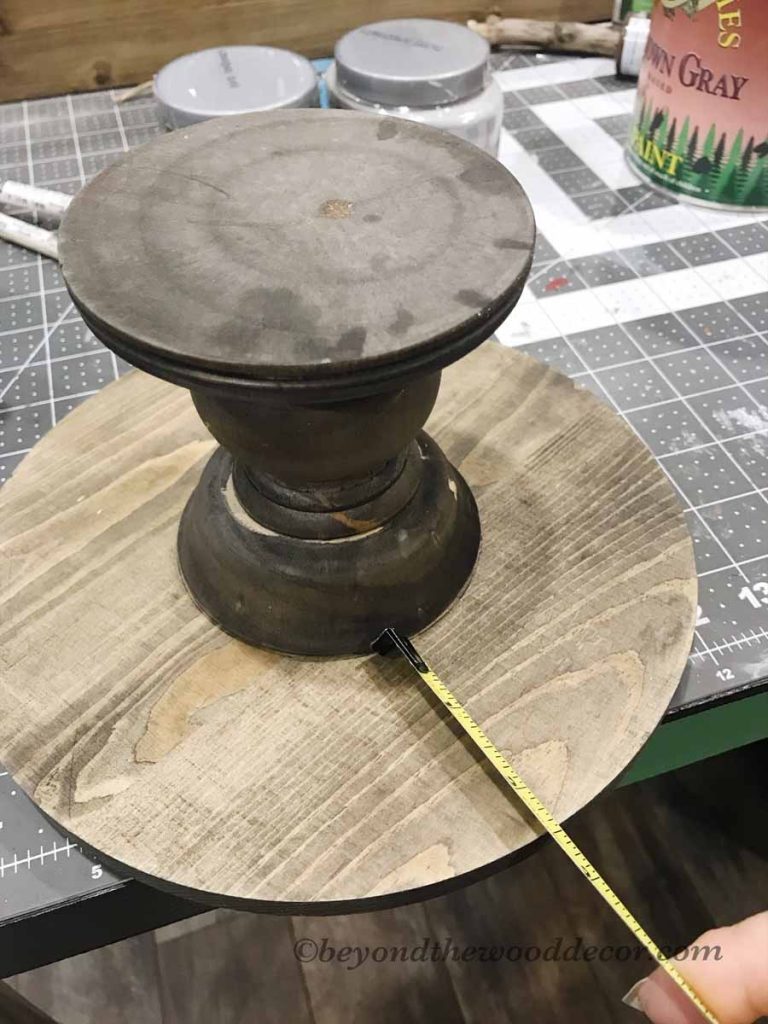
First you will need a round plaque and a pedestal for the base. These are the two I purchased because they were exactly the size I wanted for this piece.
Both items were from Michael’s craft store. If you purchase online be sure to use honey because it saved me so much money, again! Here is the link to the pine round plaque, which I love for its decorative edge. The pedestal is this one here.
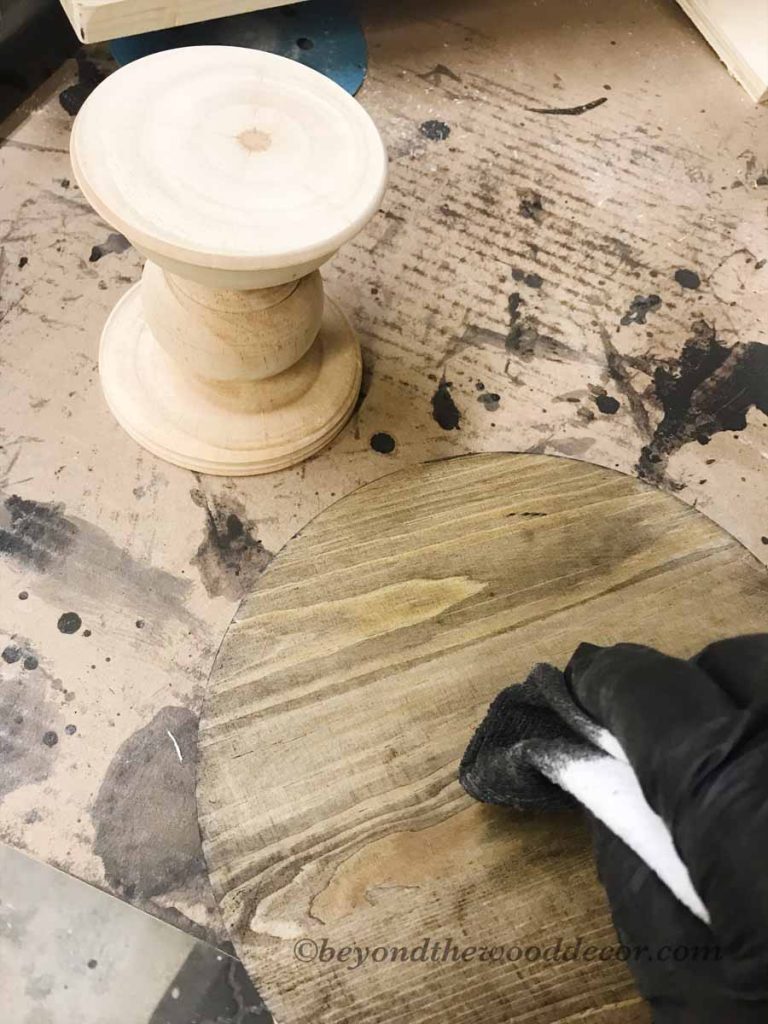
The biggest decision was whether I wanted to paint mine or stain it. But I already knew I would paint the top in buffalo check pattern because I love it. So I decided for this piece I wanted the base stained. So off I went to the shop to do that. If you rather paint yours that will be just as pretty. So go ahead and paint or stain.
Next you need to decide on the 3 colors you will want for your buffalo check. A base color and two other colors for the design.
I painted my base color on the top a pretty linen white color. This chalk paint goes on so nice and I use it for so many projects. You can get it at home improvements stores or good o’l Amazon here. But this quart is far more than what you need so keep in mind you will have almost the whole can left for other projects. You are welcome to use any paint you have. 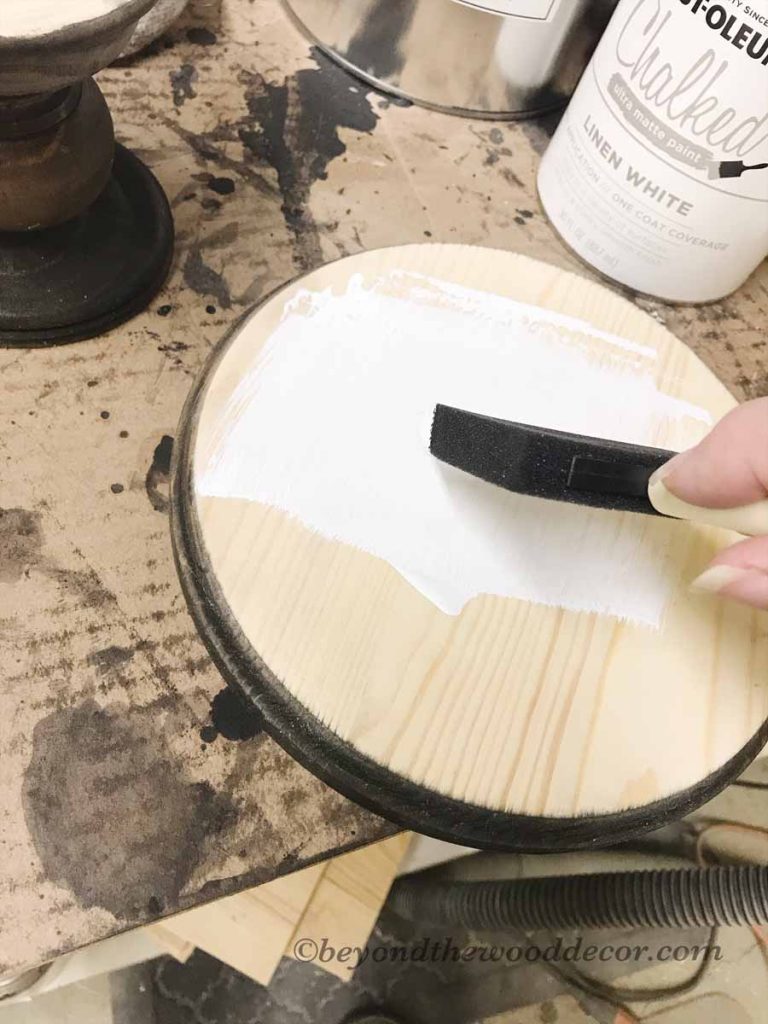
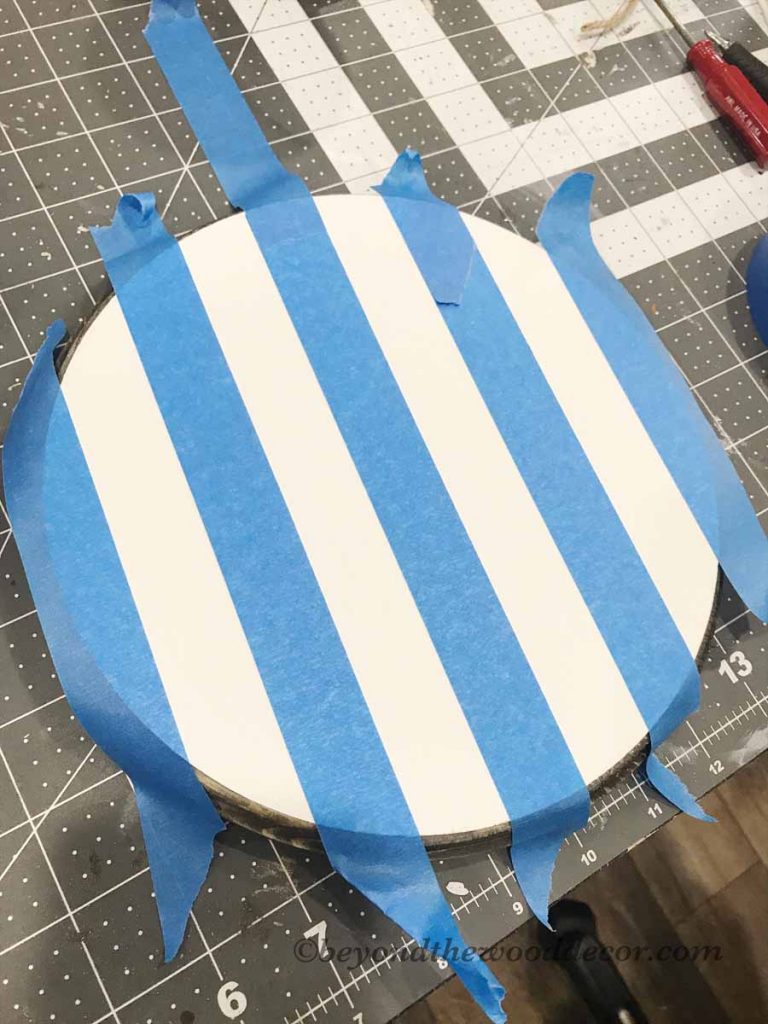
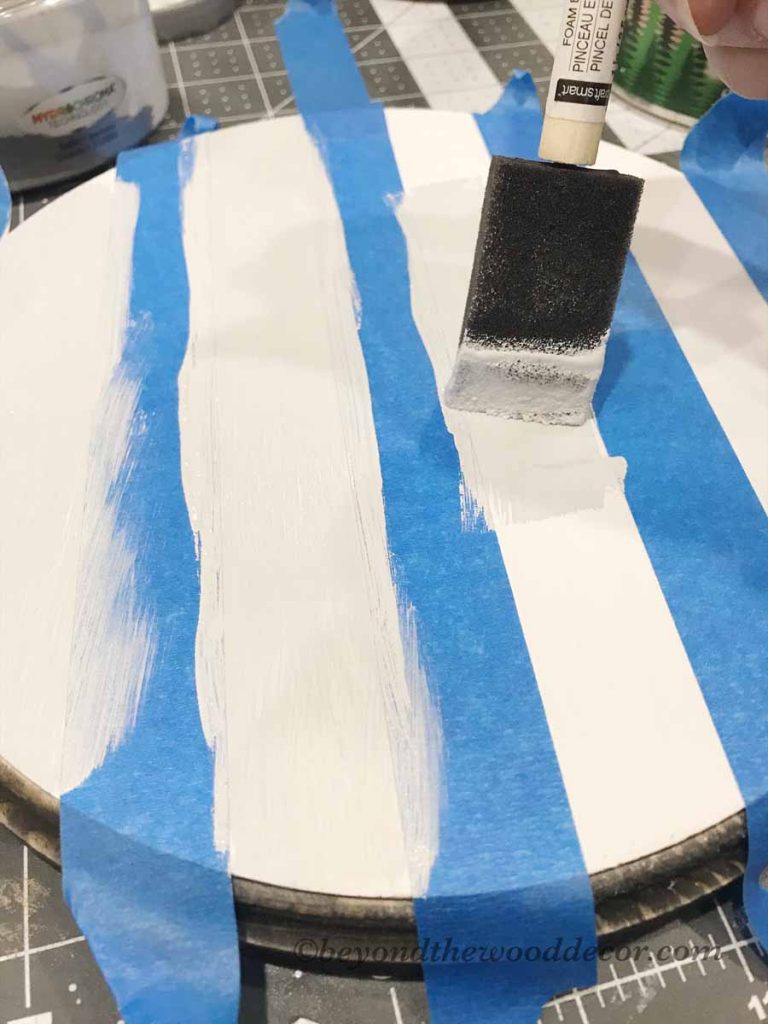
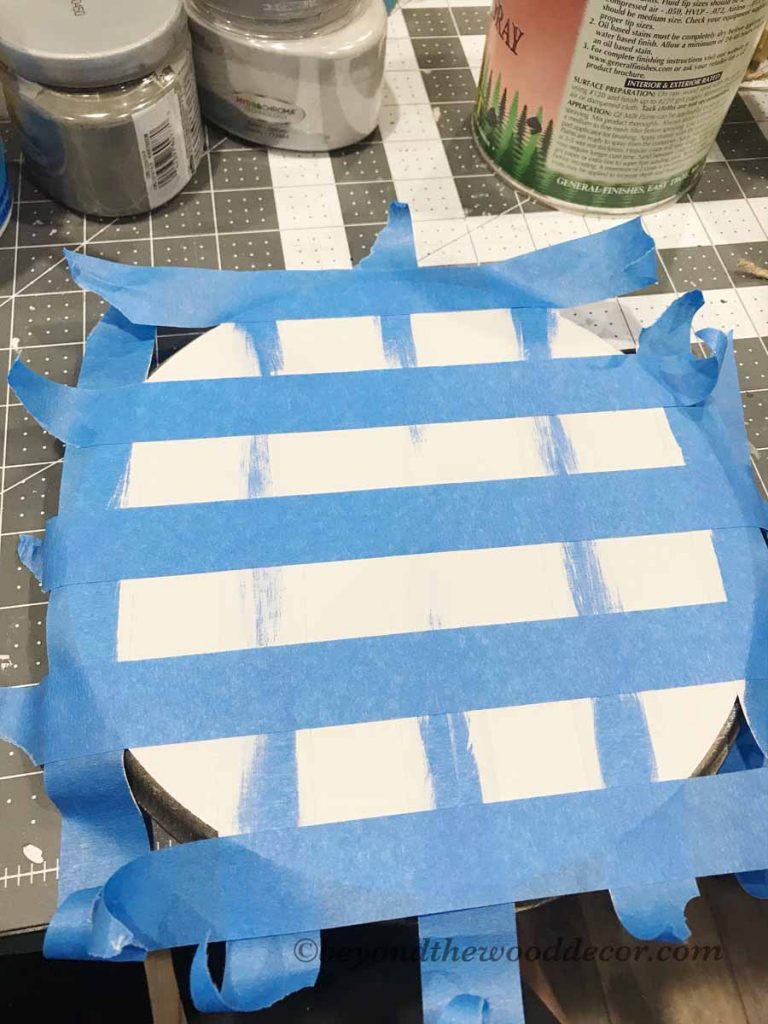
Next after that is fully dry you move onto the taping part. After really reviewing the buffalo check pattern I knew this would be the easiest way and it worked GREAT!
I used 1″ painters tape because then I did not have to measure anything, lol. score!
In this step all your tape will go vertical. I started on the end hanging a little bit off. Then cut another piece and butt it right up against it. Then your 3rd piece butt up against the second but NOW remove the second as we want every other row. So proceed in that pattern until you have it taped up like this. You see how they are the same distance apart because of the tape you had originally put there?!
Onto painting the stripes!
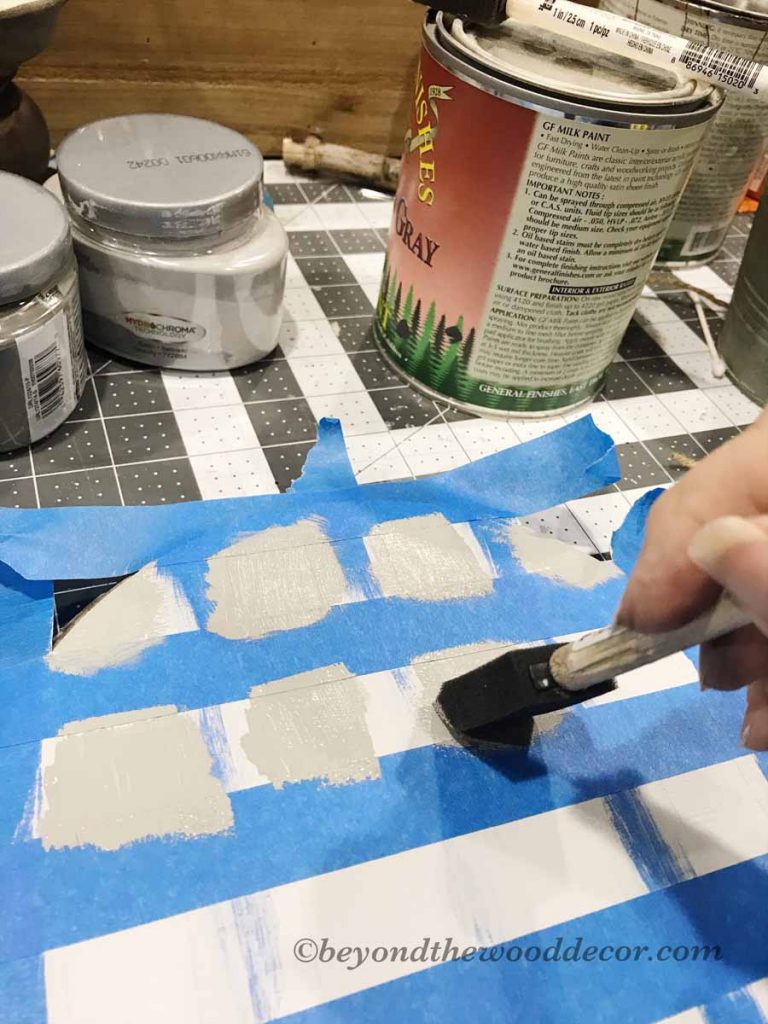
By now you should have your color choices picked out and your first set of stripes go next. So give your tape one last push down on the edges so you don’t have bleeds. Then paint away!
I went with a soft grey which is darker than the white but still a nice soft color.
Two coats were needed with this grey. After the second coat was applied I removed the tape even before it was dry as shown here.
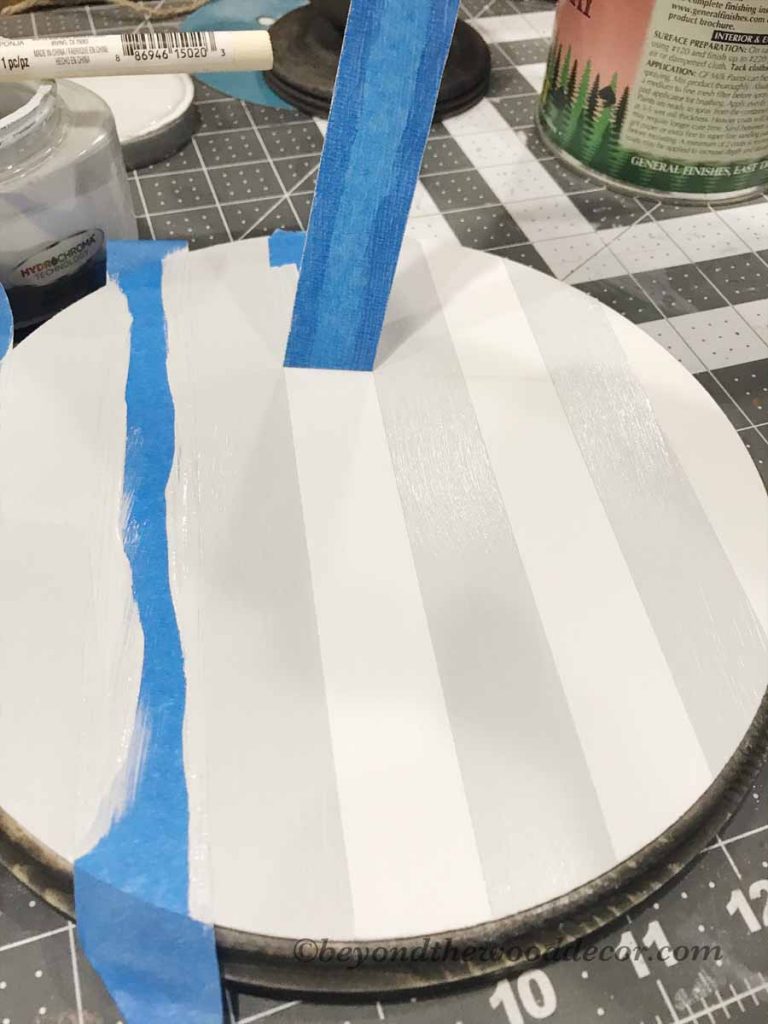
Now you could stop there and just have gorgeous stripes but I was still on the hunt for the buffalo check pattern.
Onto more taping!
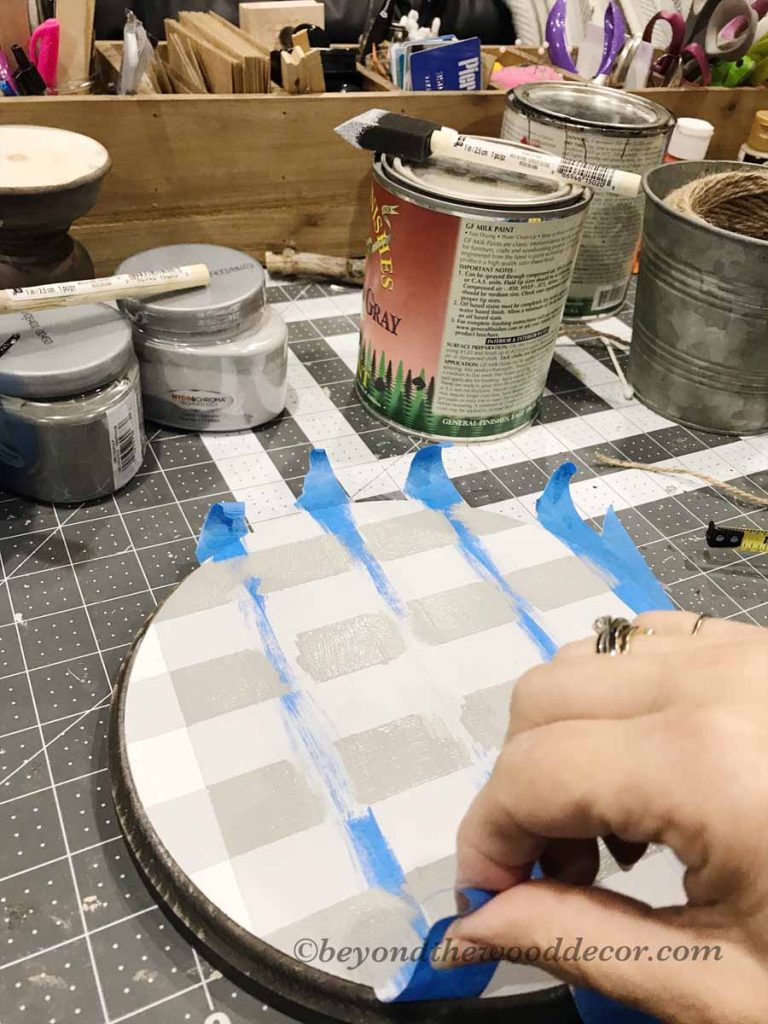
Next we turn our top around so your already made stripes are horizontal. We can once again apply our tape going vertical applying it as we did the first time. Every other stripe, removing the ones in between like here.
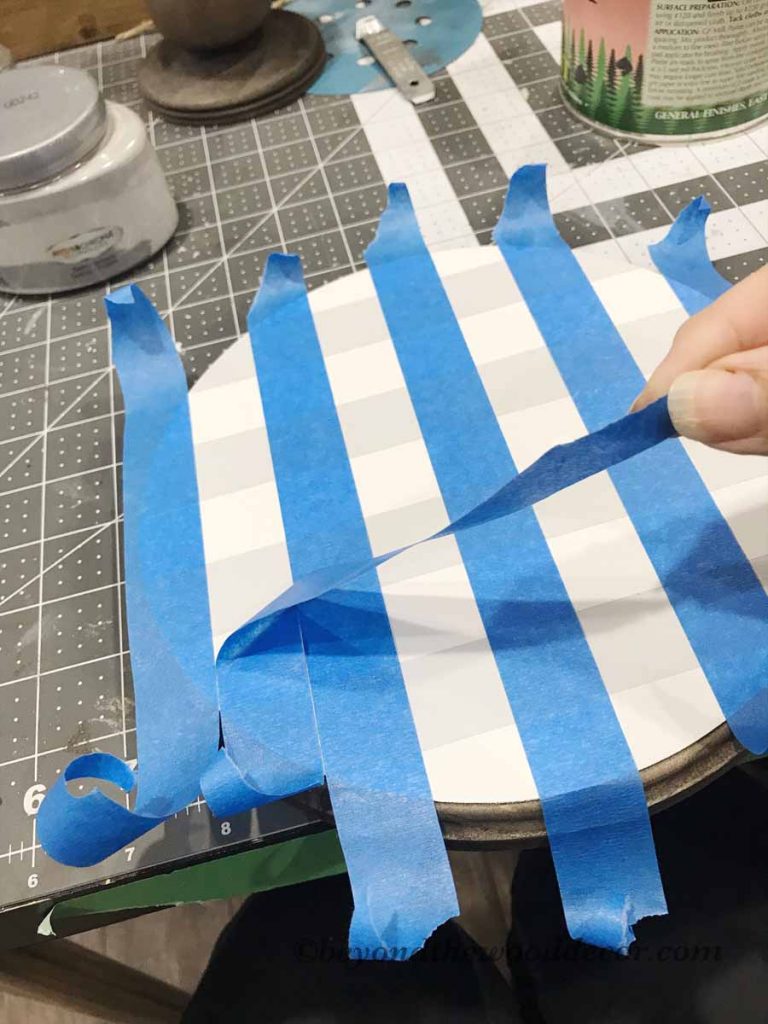
Once again using that same color go ahead and paint those stripes with two coats. BUT DO NOT REMOVE THIS TAPE after the second coat.
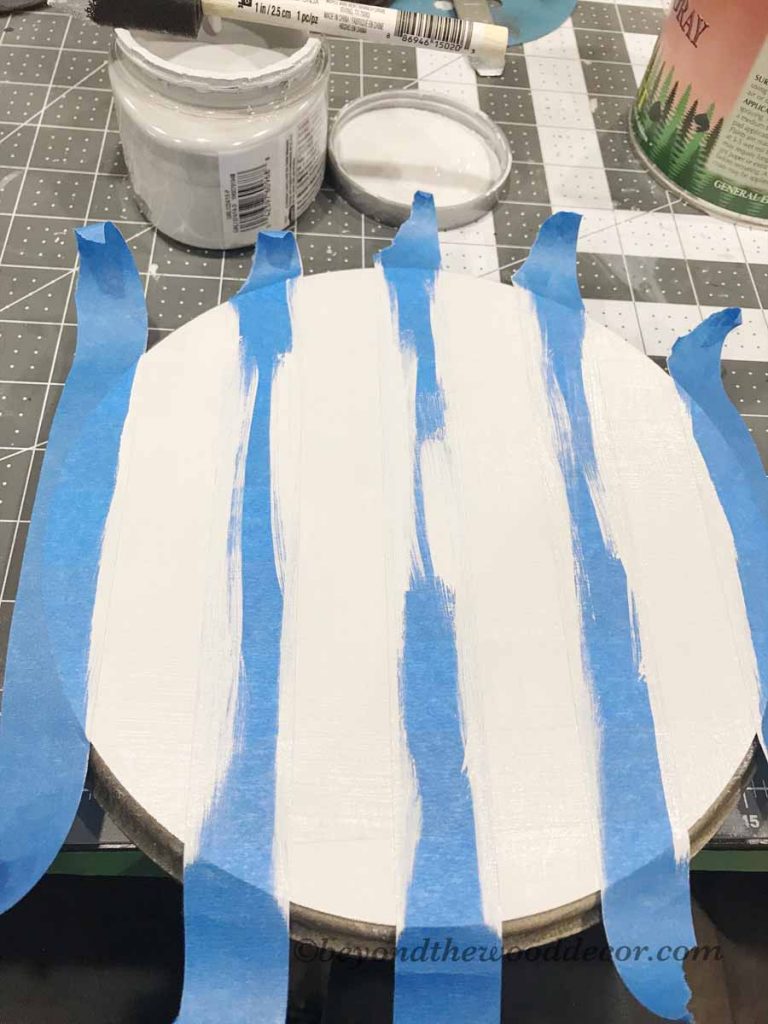
Instead we are going to apply more tape on top of these but over the first row you made in the first step. You will be able to still see those lines so put tape directly over that like this.
Now you have just those squares for your darker color. So this is where I did a darker grey. Go ahead and paint each square probably two light coats as I did.
Looks like a hot mess but oh trust me it will be so darn cute! Paint all them open spots. You will have some smaller on the edges so go ahead and paint anything visible. 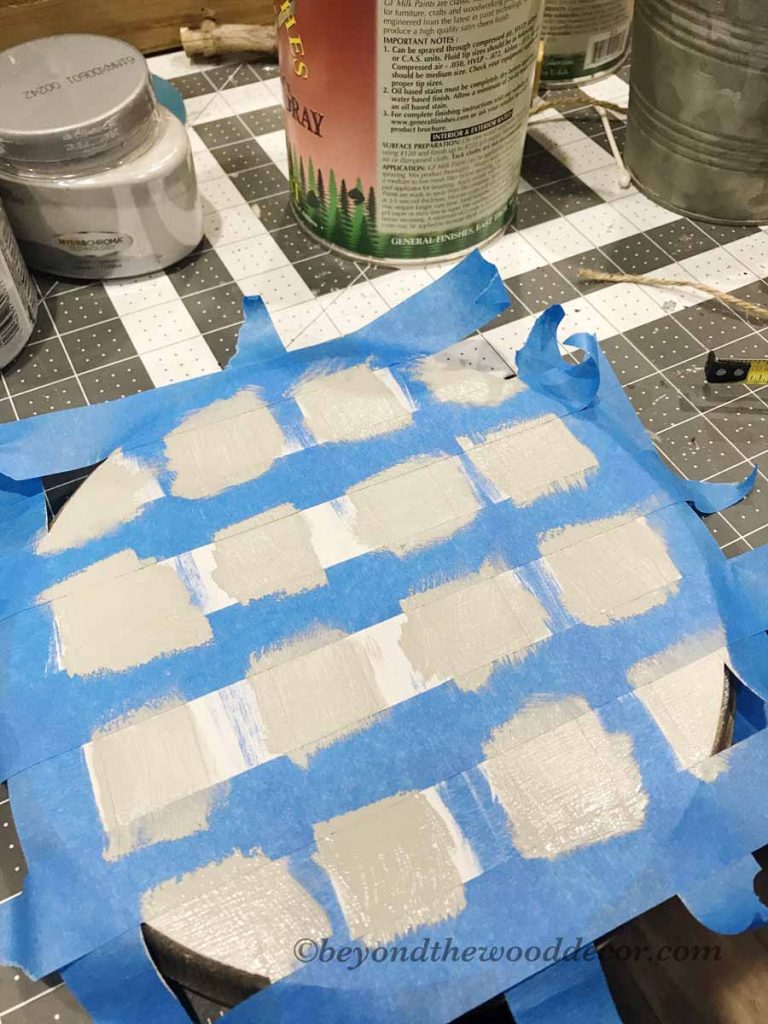
Almost done!
Now its time to remove all the tape……are you ready…..lets tear it up!
There you have it….all the tape is up and you can do small touch ups if needed with a small paintbrush.

I mean seriously, is that the cutest lil mini stand you have ever seen! okay, maybe just a little exaggeration but it is really cute, right?
I did get some paint on that outer lip but no biggy I just wiped it off and put some stain back on it. Also, I did put a clear coat on top just to protect any chipping or anything. But you don’t have to if you are using it for simple stuff on top.
Onto assembly!
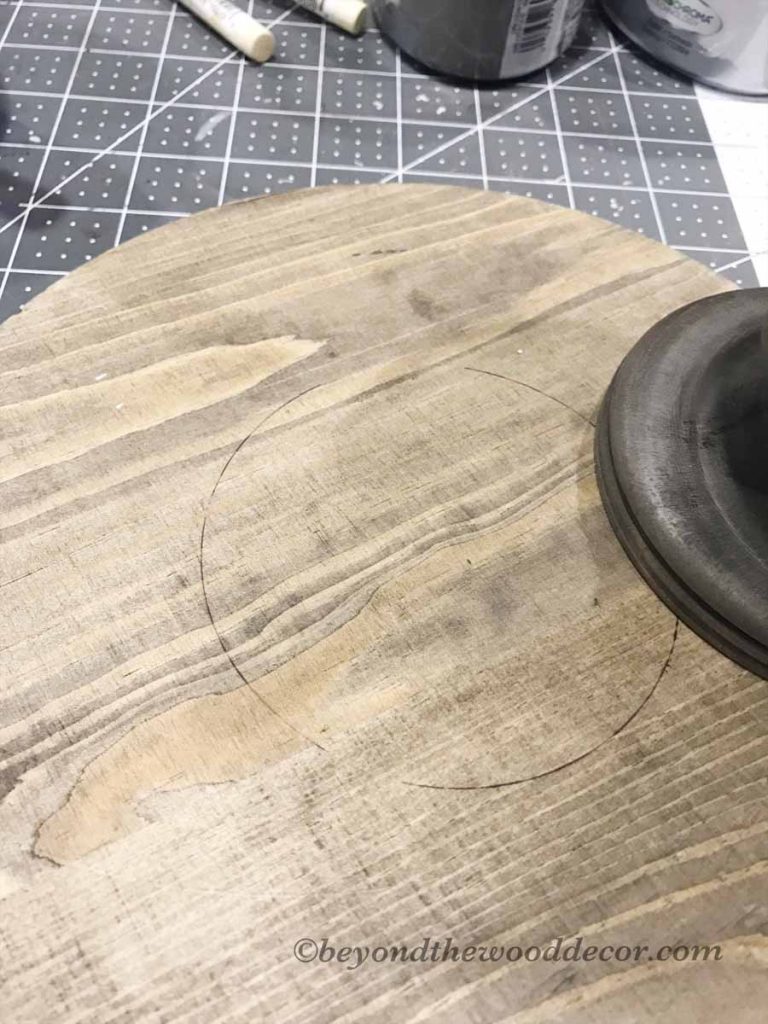
All I did here was after everything was totally dry I flipped it over and measured where my stand would go. The center would be the same distance around from the edge of the pedestal. I then took a pen and drew a line all the way around it so when I lifted it up to put the glue on I would know where it needed to go.
You can use wood glue or E6000 glue. Both will work great on wood. E6000 I get here.
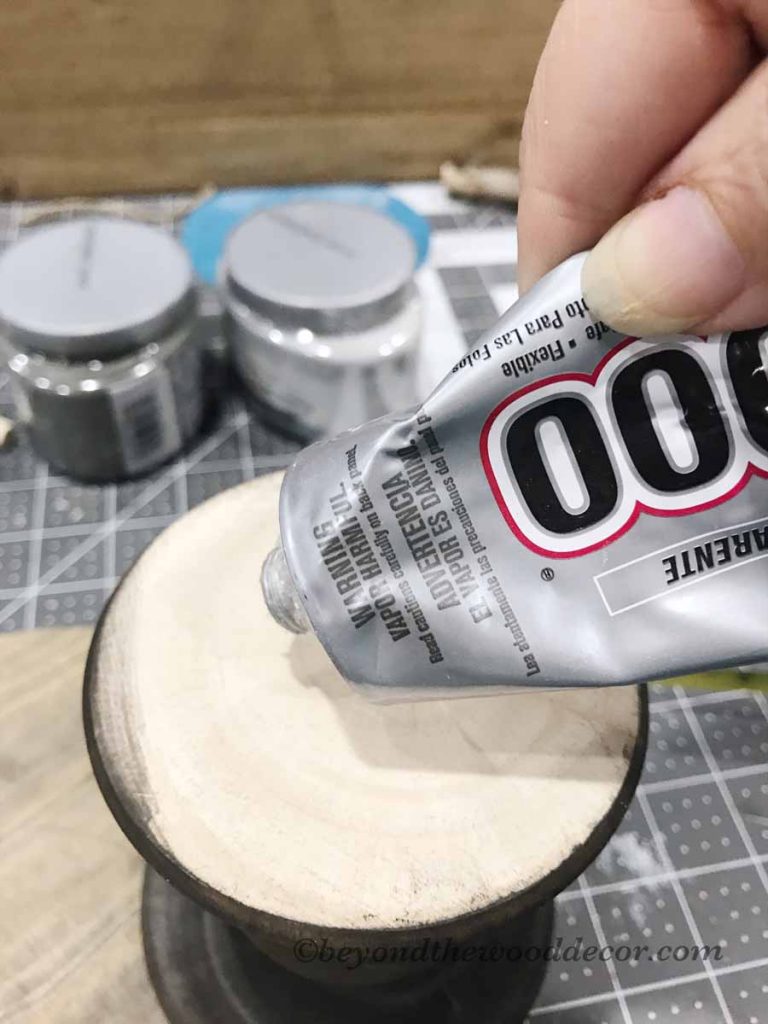
Spread the glue all over and then stick it on your marks you made earlier. This glue takes awhile to dry so I just set a small paint can on top of that pedestal to apply pressure while drying over night. Make sure it is not shifting though as the glue can do that if you are not on a completely level surface. In that case you can tape it down or set something around it so it stays where it needs to stay.
Drum roll…….tada……
There you have it. Look how cute it turned out.

I seriously could not be happier with it. It will be so adorable in so many ways in any decor.
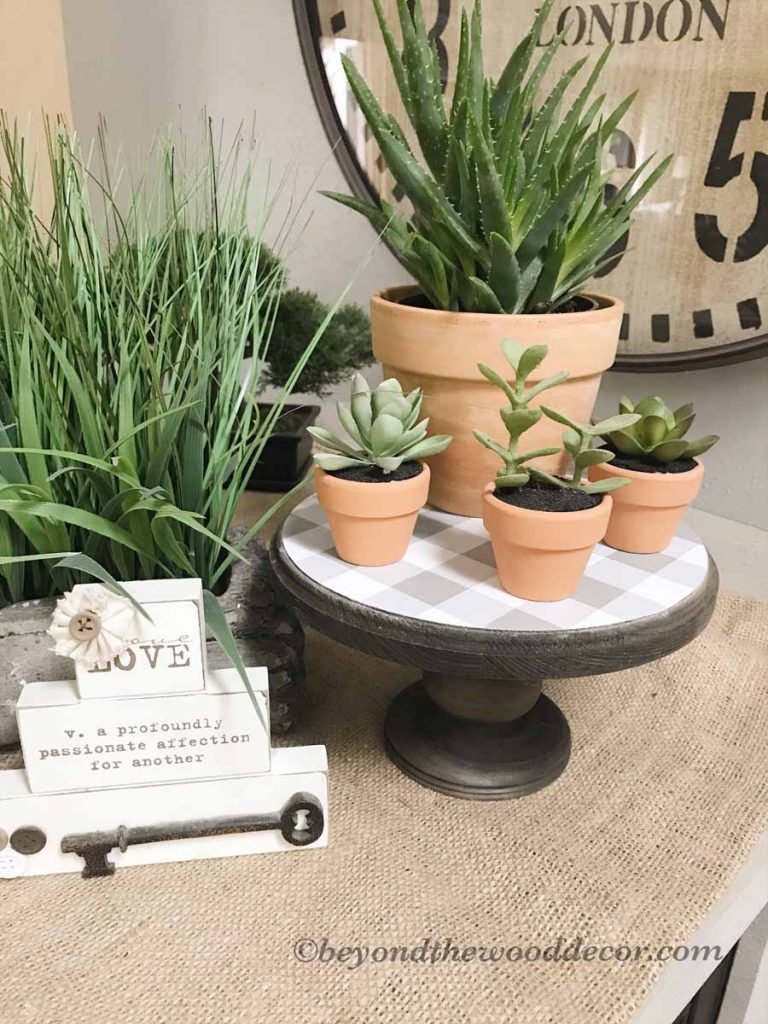
Ideas are endless!

I hope you enjoyed this super cute and yet very easy DIY. Will anyone make it? I hope so and would love to hear about it.
Feel free to ask any questions in case I missed explaining anything. I actually am doing another one in white. Because I am setting that one on a really dark shelf or my counter which is also dark so the white will really pop. I will also share that one this weekend when I get it done and add to this post.
But for now, enjoy the rest of your day and make it great!


Oh Tammy this is really cute! I would love to try and make one but I am more the type that will buy already complete. 😝 I am not the crafty girl and would mess up something. Thank you for sharing I look so forward to your posts. 😍
Oh you are welcome Amanda, thank you for your comment and don’t be afraid to dive right in. If you messed it up you can always paint over or sand off. Nothing is permanent!