
Bedroom Makeover Reveal
Hey friends. So many of you are anxiously waiting for the reveal of my (almost finished) bedroom.
Finally we are back in the bedroom after having the carpet installed and cleaned.
For those of you new to this bedroom project you can see all the days prior to this reveal right here:
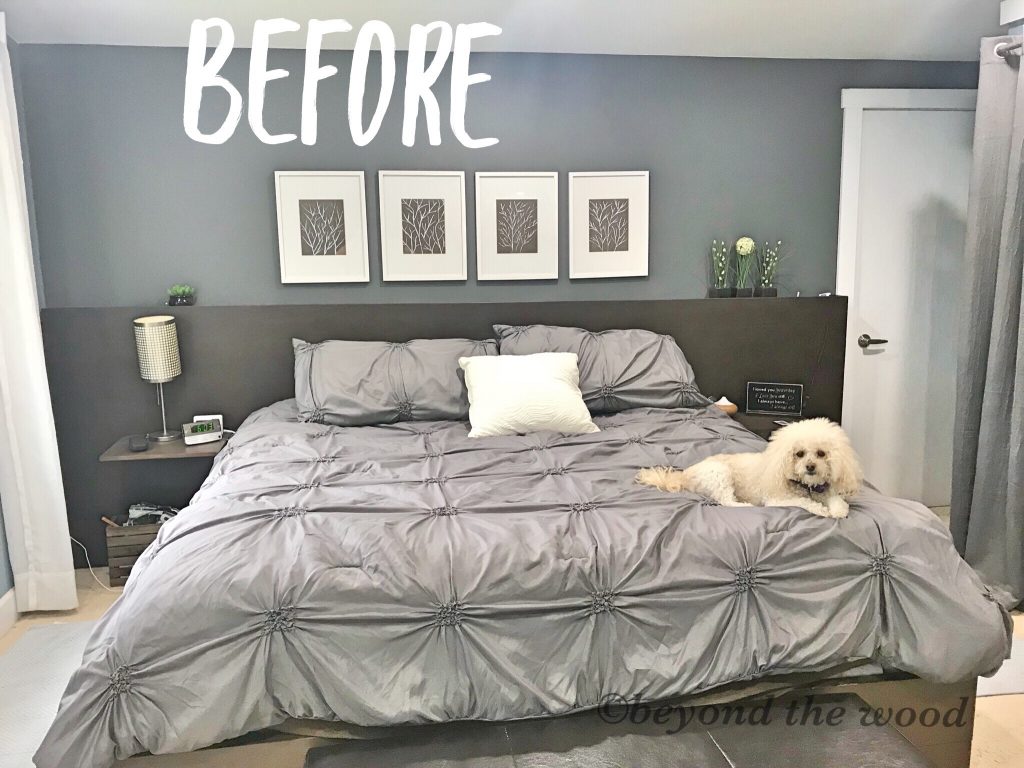
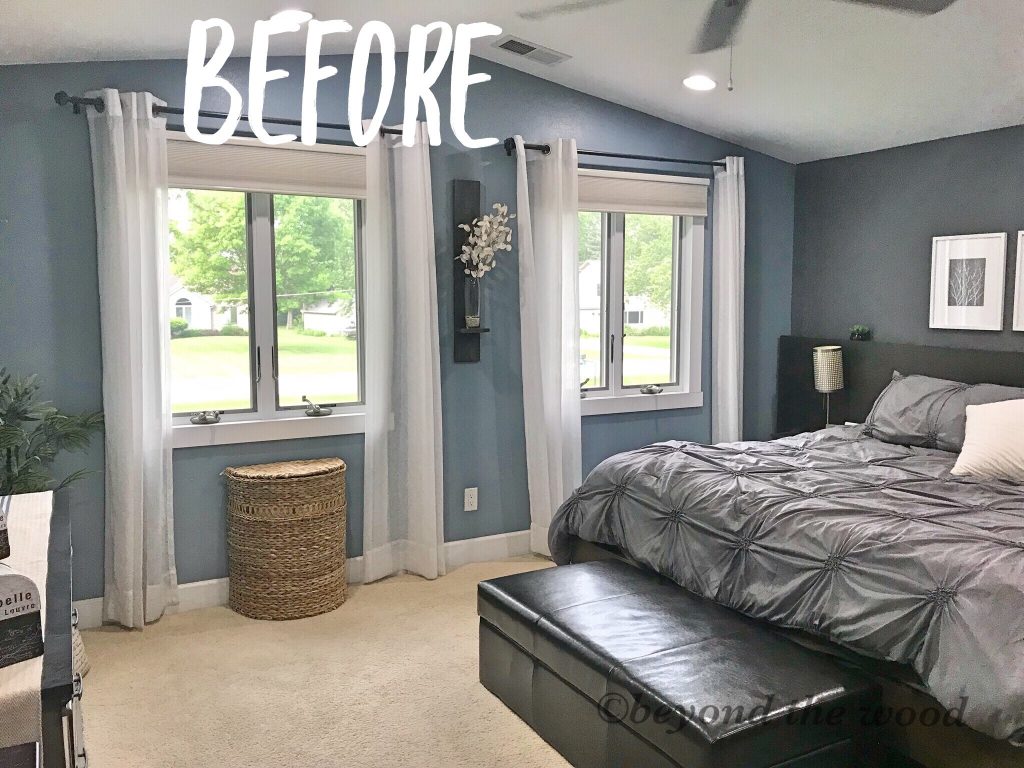
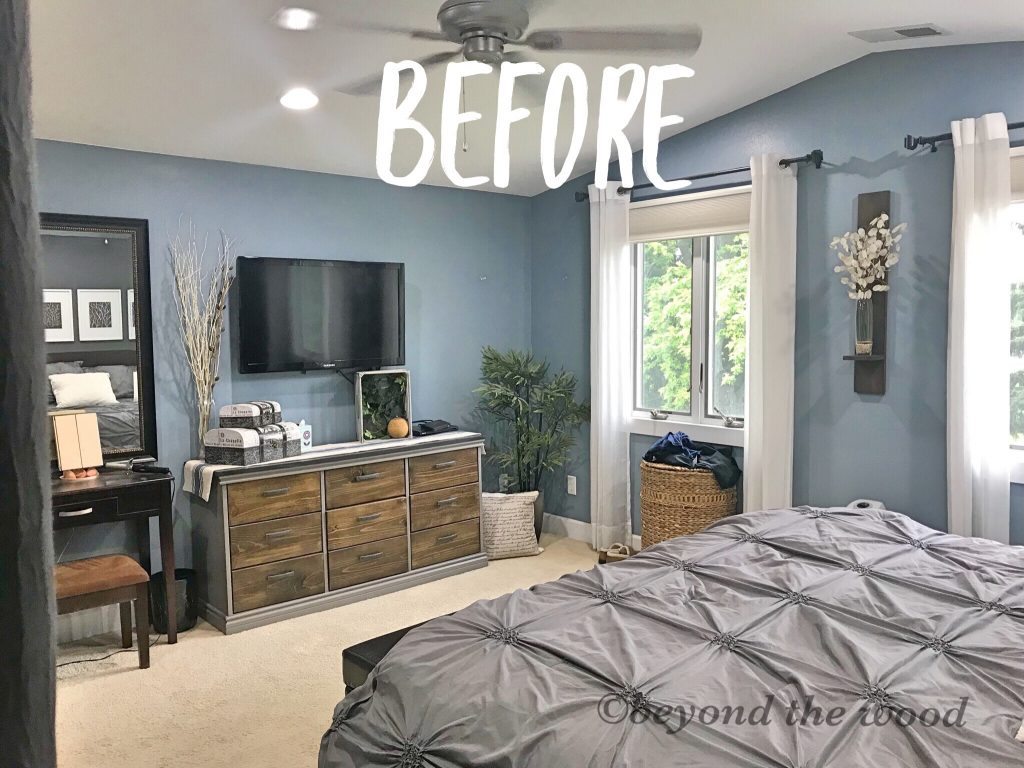
Day 1 Bedroom Makeover All the before photos are here.
Day 2 Bedroom Makeover Paint day and the start of re-doing the headboard.
Day 3 Bedroom Makeover This post is all about the carpet, completing the headboard, night stands and valances. Along with a peek in my “she shed” and the treasures I found.
Day 4 Bedroom Makeover Project Day Many projects for the room are here. They include a hanging table, botanical prints, cotton stem wreath and much more.
This makeover was so refreshing. I mean I have had a blue and grey room for 10 years now and prior to that a beige room so color was for sure in the palette. This time around I really wanted that modern farmhouse look and I think it has been achieved. Because I love the outdoors I wanted to bring many elements of the outdoors inside. So windows and shutters and botanical’s did all of that and more.
I still have a few things I am doing to finish up the room but time with work has not allowed it. I still need to paint my vanity and I want to get a cute rug at the back end of the bed for more pattern and dimension. But for now it will stay like this until I find the perfect piece.
Alrighty, lets get on with the reveal. But first I will take you back down memory lane with some before photos. You can find many more here.
I think to myself what took so long to redecorate but seriously I did love this room but ya know having something the same for 10 years you kinda get sick of it. Plus, my creative gene in me needs change more often than the normal person, lol. Some of you may like the before better and that is okay, it was a beautiful space.
Hubs doesn’t get it why it needed updating either and thinks anything is fine for 25 plus years but he rolls with it! (thank goodness) lol
Reveal Time!
Okay, now the bright, warm, refreshing, changed room! See what a difference paint and few updates can make!
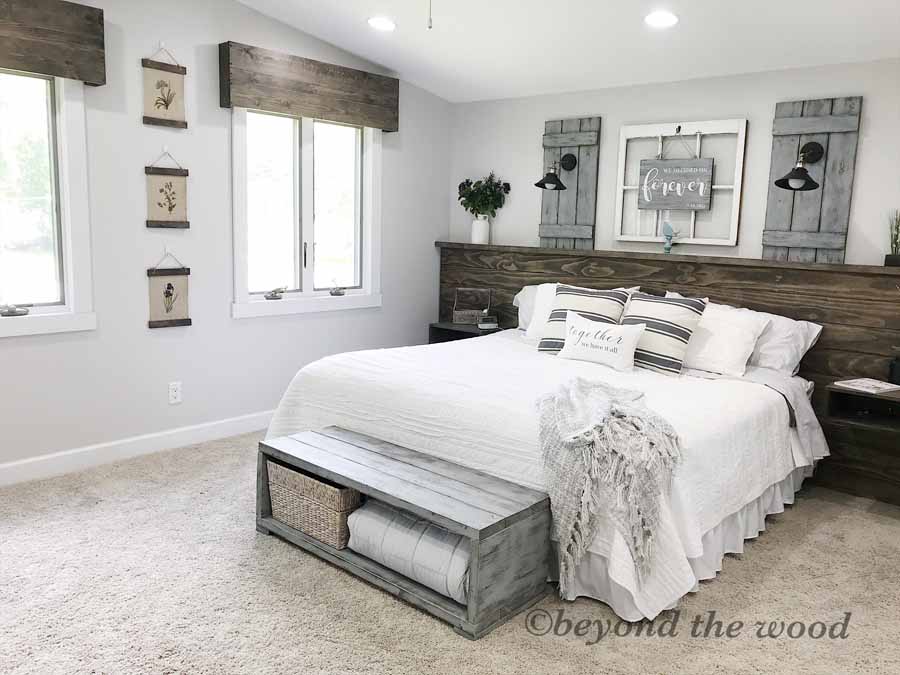

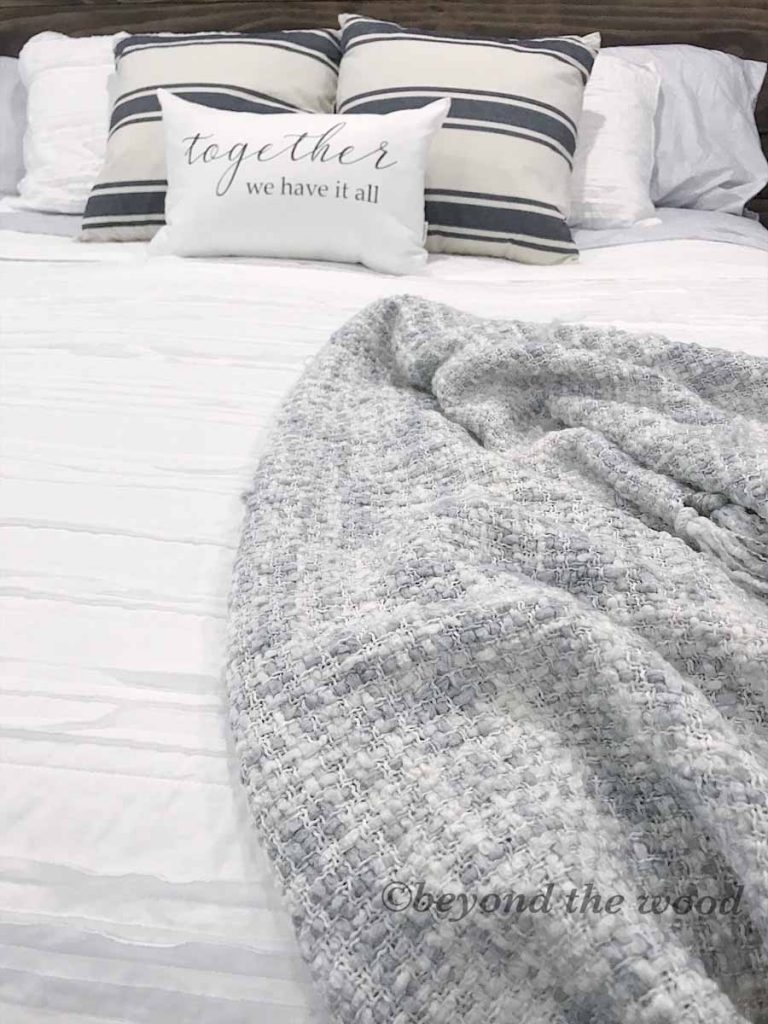
Let’s talk about that bedding. I love the quilt! It is from Target and here is the link. Many might say how can you have white with a dog. Well that is pretty much just for show to brighten everything up. lol.
I actually have a blanket underneath it and I just roll the white quilt back at night so she nor us even use it. But it is all machine washable so there should be no problems. The pillow shams have been out of stock for 6 weeks now in king size and are still out of stock so I went with standard size. Not carrying if they were smaller than my king pillows in the back I think they layer nicely. Here are the pillow shams also from Target.
The bed skirt is from good old Amazon. If its not Target its from Amazon my two favorite stores. 🙂
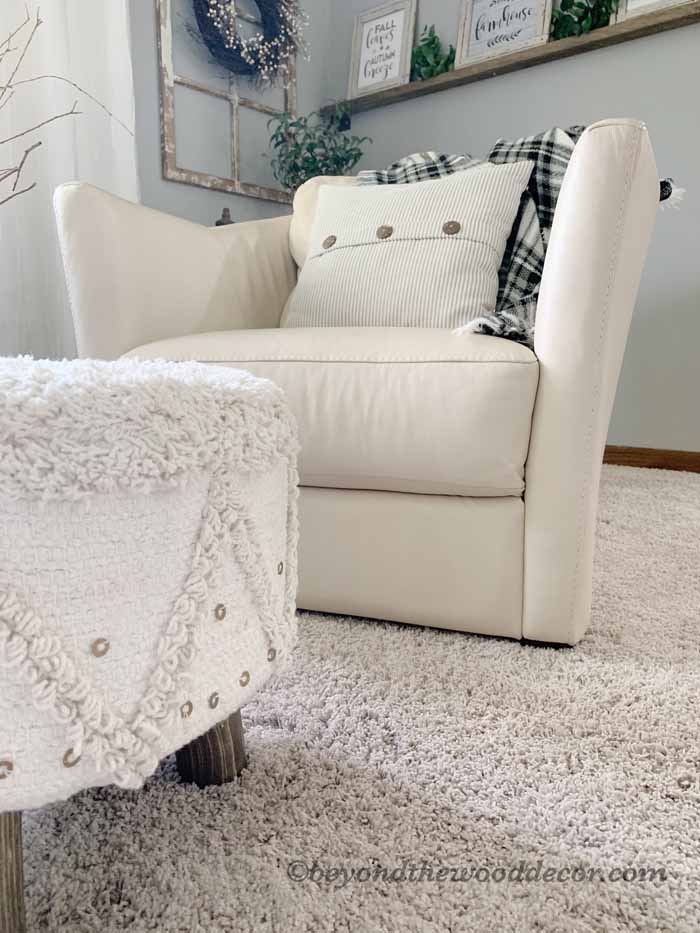
The “together we have it all” pillow I made and the striped grain sack style pillows are from Home Goods and they match the chair cover I redid last week.
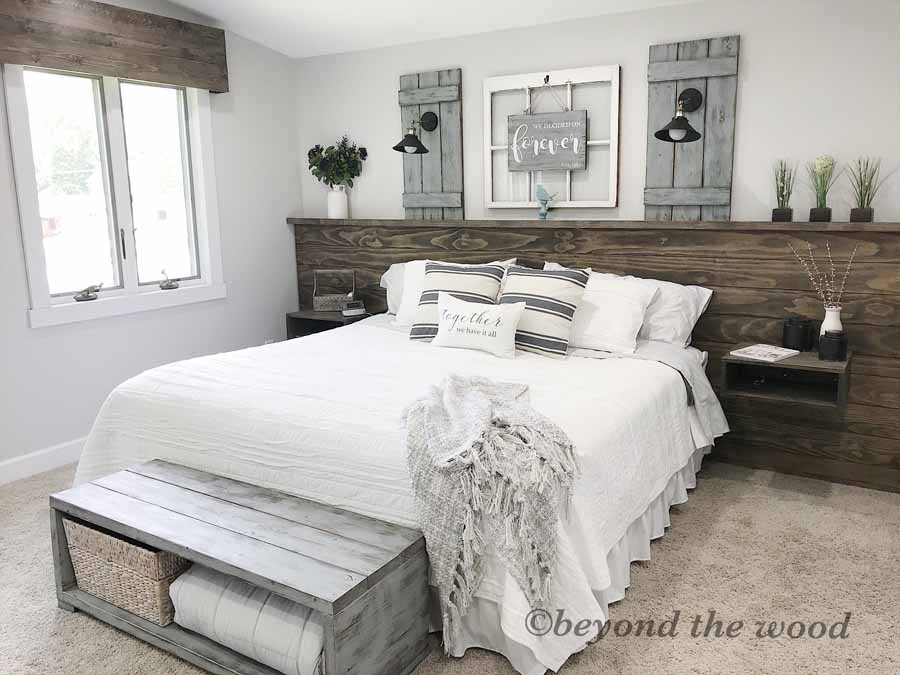
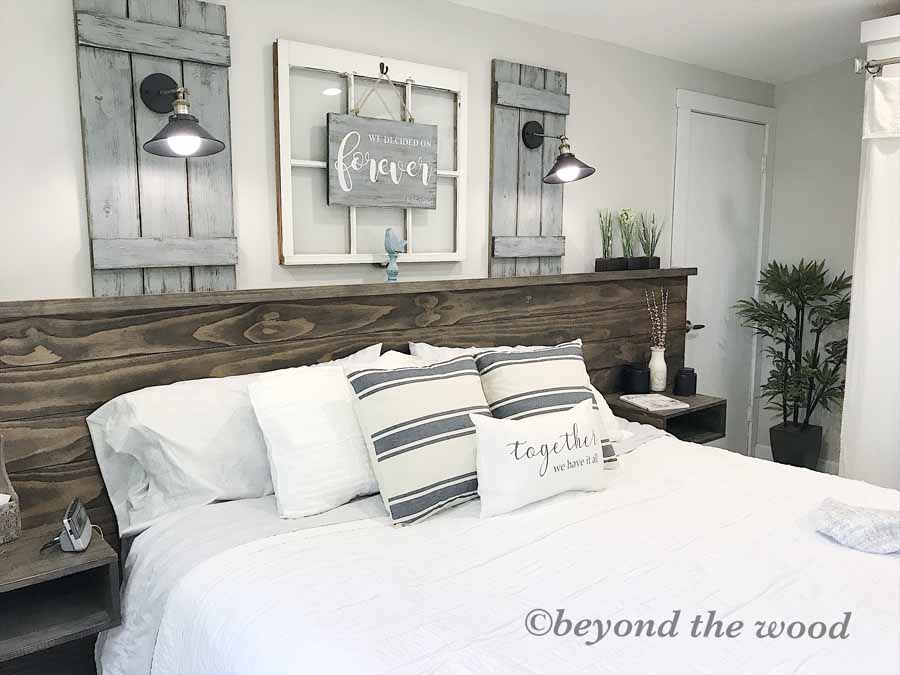
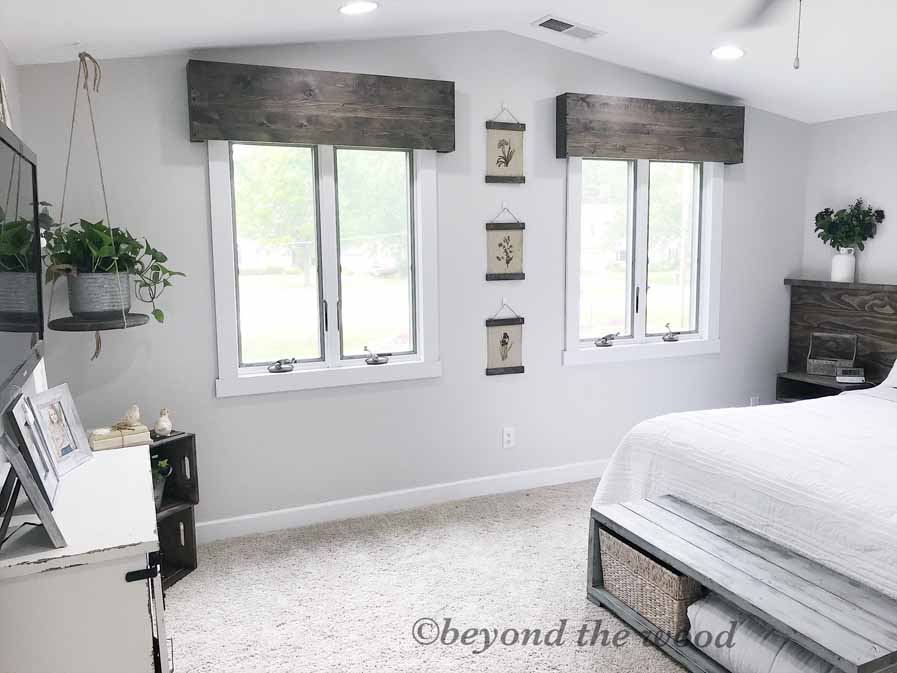
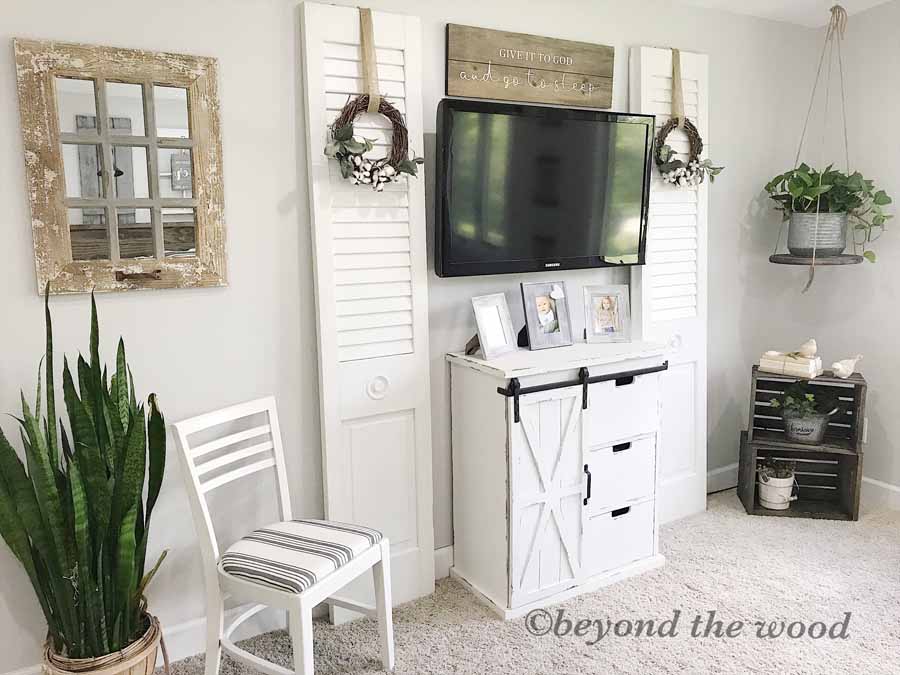
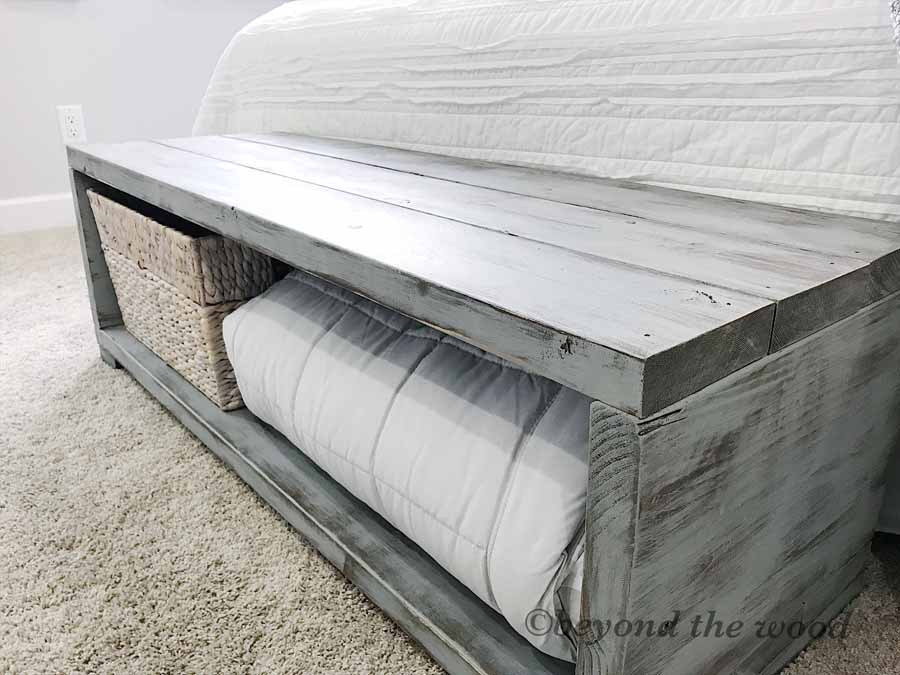
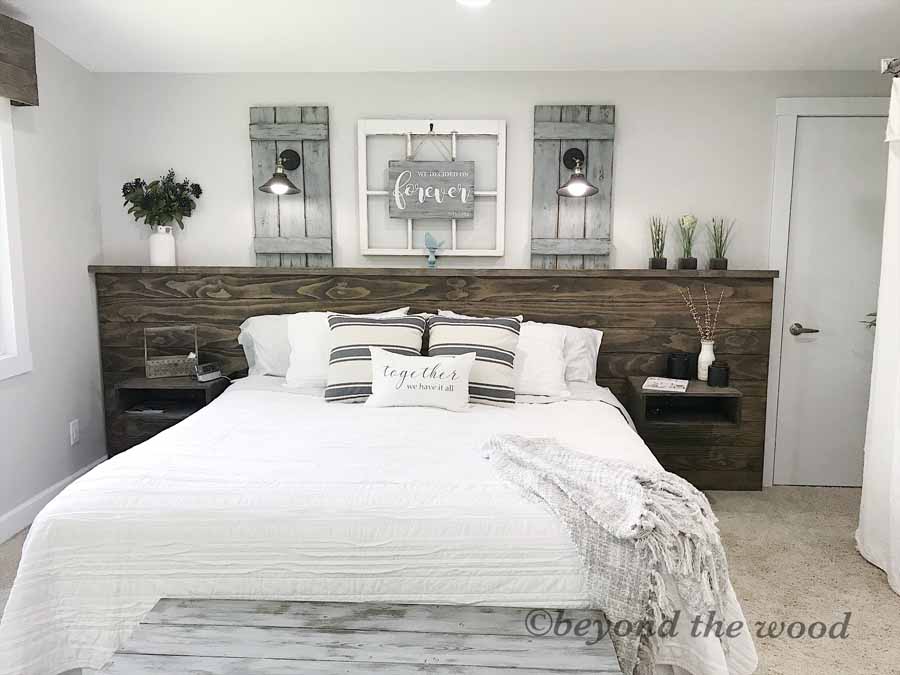
How about those shutters…..I love them! They have a blue hew in them which is hard to see in the picture. But I did make them along with the bench at the back of the bed and I painted and distressed them all the same.
All about the lights!
I am in love with the lights on the shutters. They actually come as hard wired lights but hubs stepped in and wired them to an extension cord so they can be easily moved around. I got them from Amazon here and are so perfect for softer lighting and for reading in bed.
All he did was cut the end of an extension cord off and split those wires and connected them to the wires on the light. Wrapped some electrical tape around it and hung them on the shutters the same way you would a wall. Yes, they are totally safe and no different than having them wired in a wall.
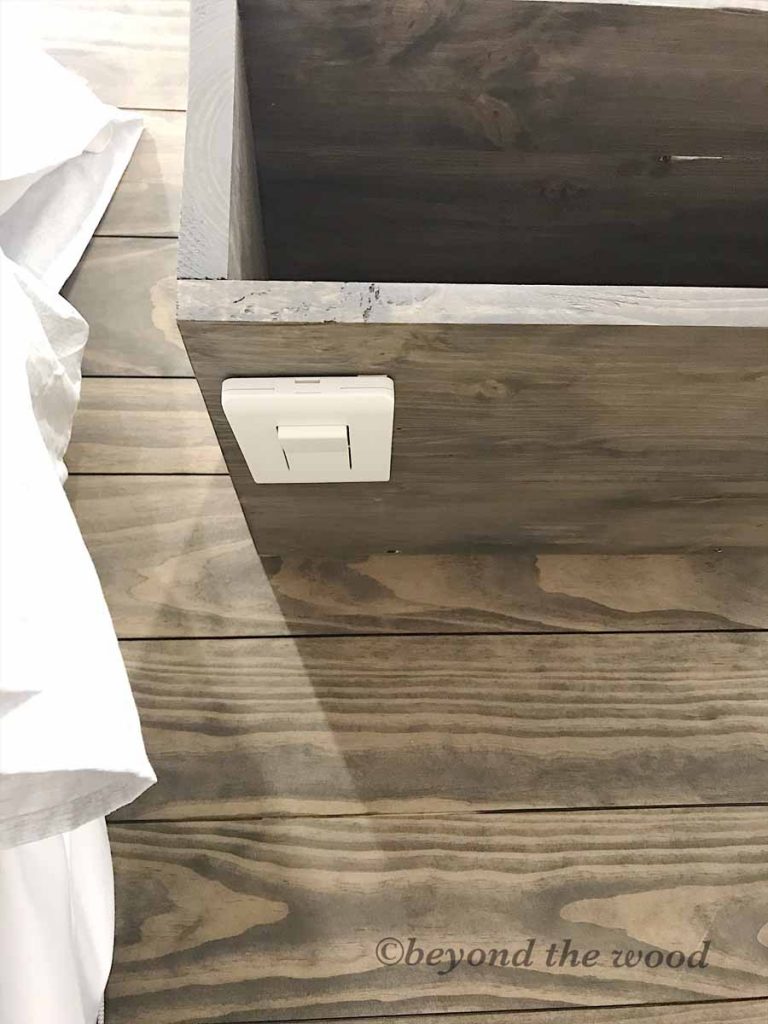
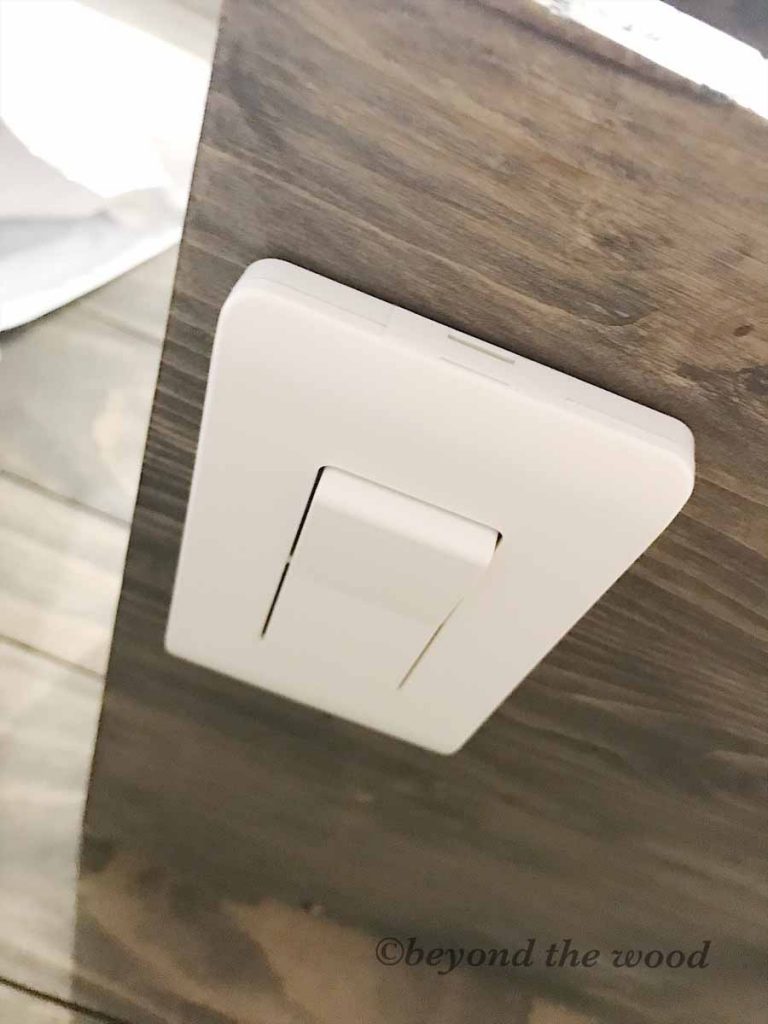
We then got a wireless switch which you plug the extension cord into and that plugs into the wall. They also come with a switch for turning on and off. They are so fantastic! We use them for other things in the house like on our light bar above the TV in the living room and at Christmas for the tree lights and such. You can buy them on Amazon here or any hardware store. I hung the switch underneath the night stands so we can easily turn on and off when in bed but still out of sight. We both have our own control on each side. Here it is.
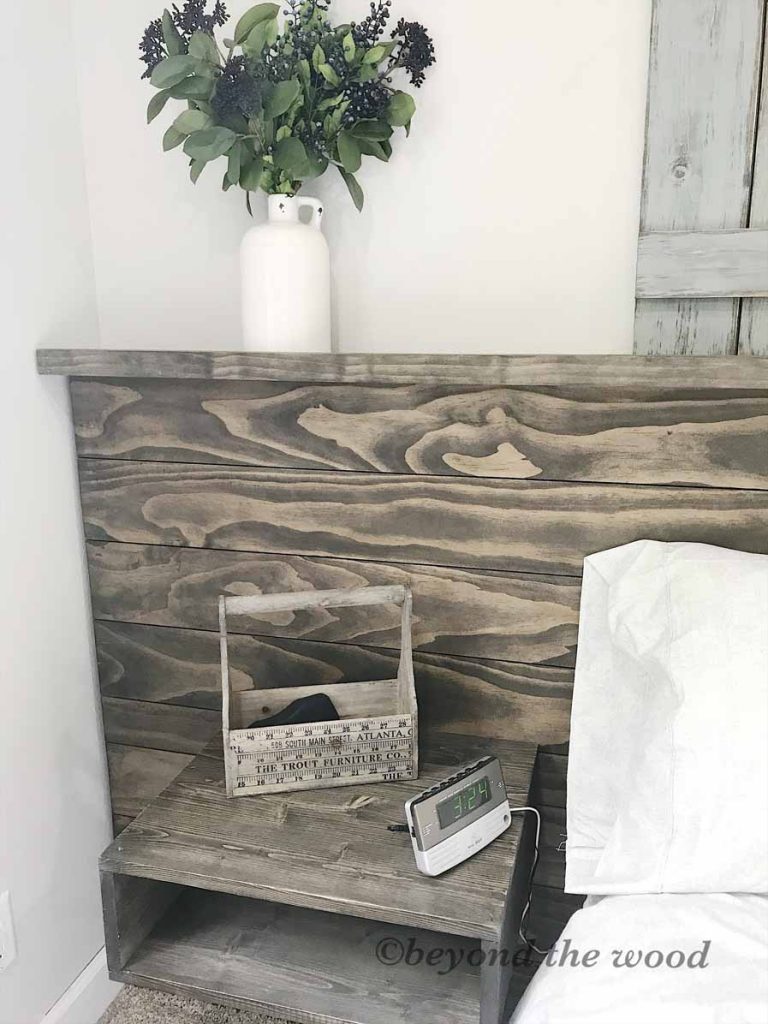
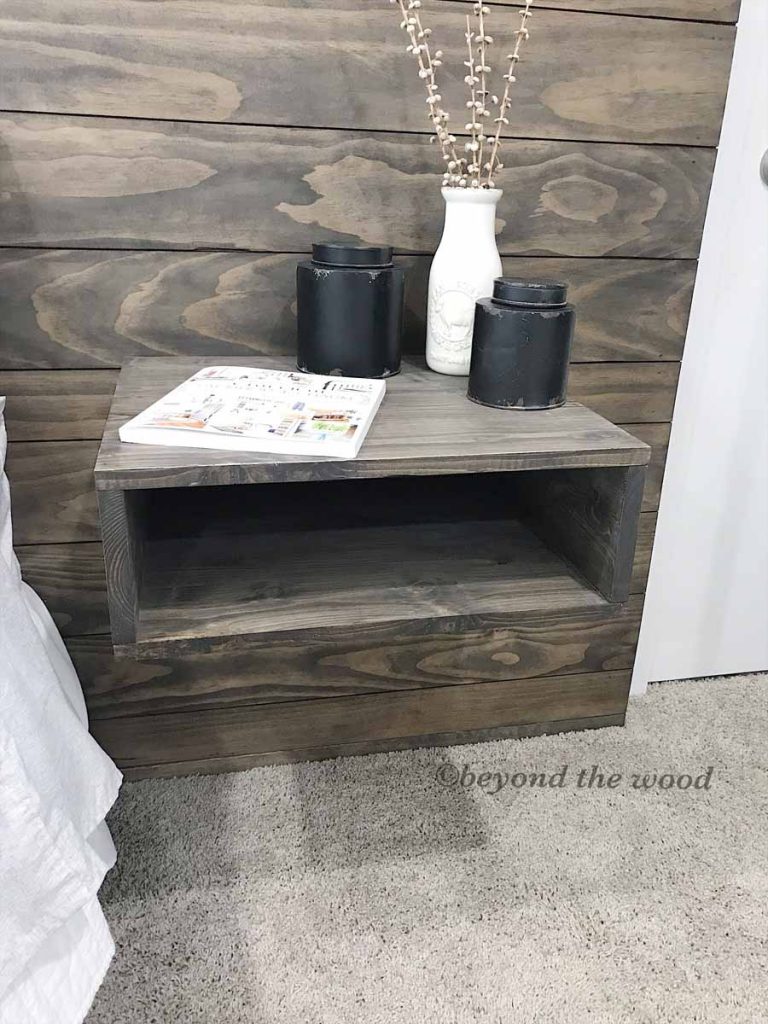
Floating Night Stands
I love these floating nightstands because it is so easy to clean and vacuum under them. They also hold a nice stack of books or whatever you keep at your bedside.
When I asked hubs the other day what he thought of the finished room he did admit he thought it was really nice! YAY. Do ya think that little toolbox decor on his night stand sold him? lol!
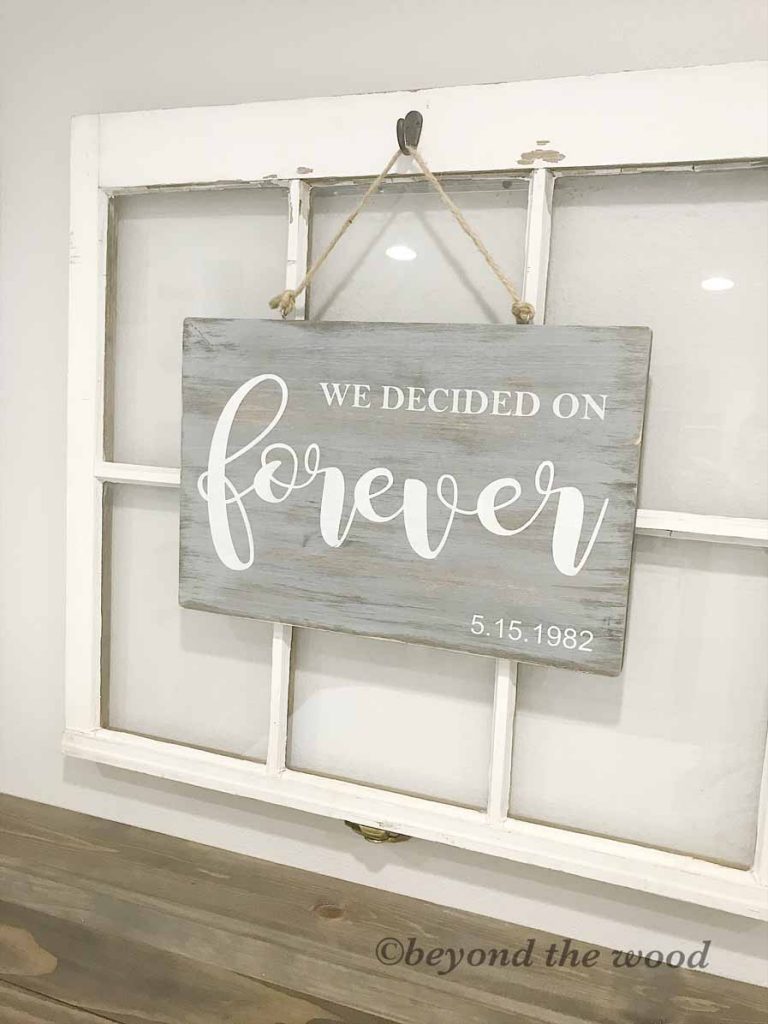
I also, love my new sign. I have been wanting to make it for a long time and glad to have had the chance to do it.
Hanging it on the window was perfect. Initially I thought about a wreath up there but then knew I wanted some wreaths on the doors by the TV so I decided to hang it there. Again it looks more grey in the photo but it does have a blue hew to it.
Check out the window while you are here, isn’t it just fabulous with the chippy paint? That was one of my great finds in my “she shed”. lol


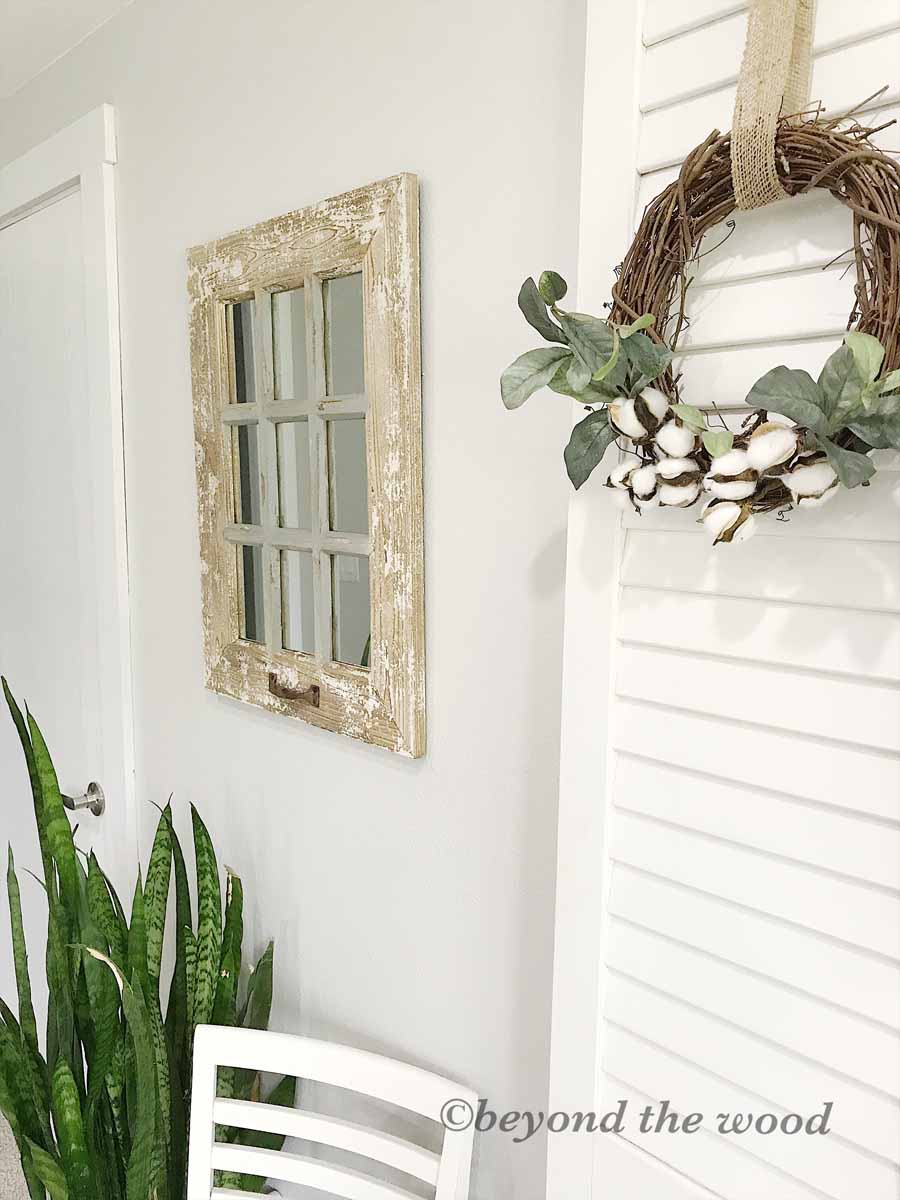
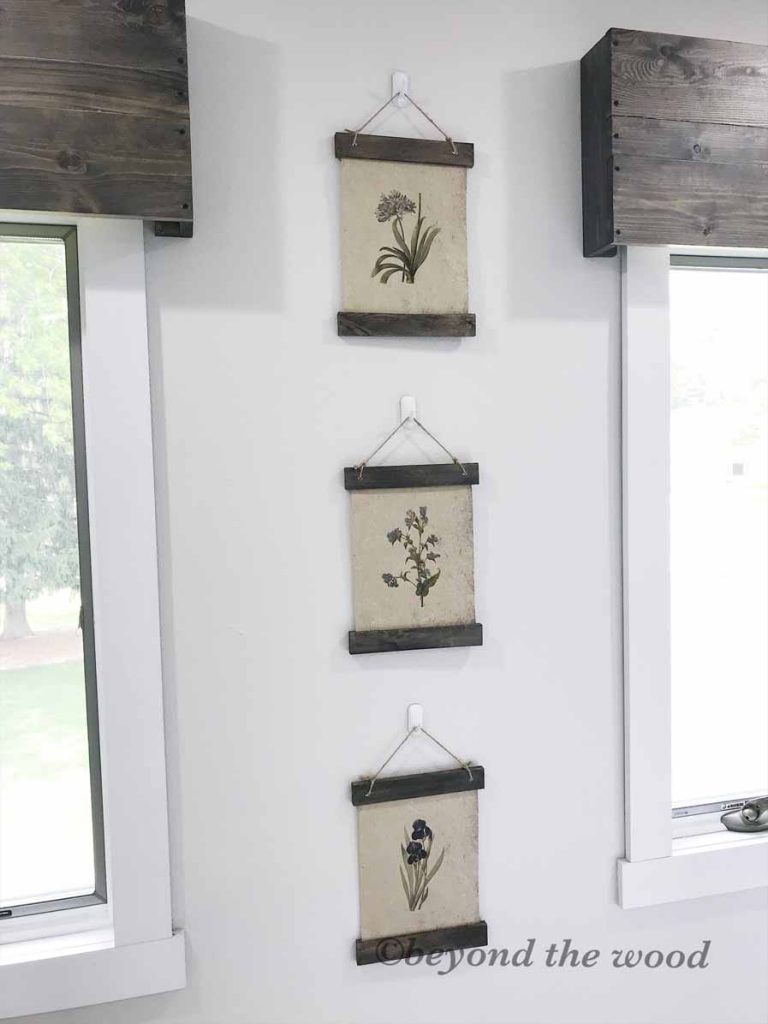
Once again here are the finished valances and botanical prints I made. I love how the prints bring in that antique vibe, and yet are so simple and pretty.
Hubs picked up some command hooks to hang them up but they were silver so I just sprayed them white. I really should have looked on Amazon because here they are already white ones. Oh well! The valances I hung real high so much of the window would be showing to bring in more light. They also match the headboard which is such a pretty rustic stain.

No more big dresser!
I love this little cabinet I found. It is perfect for extra storage and looks adorable.
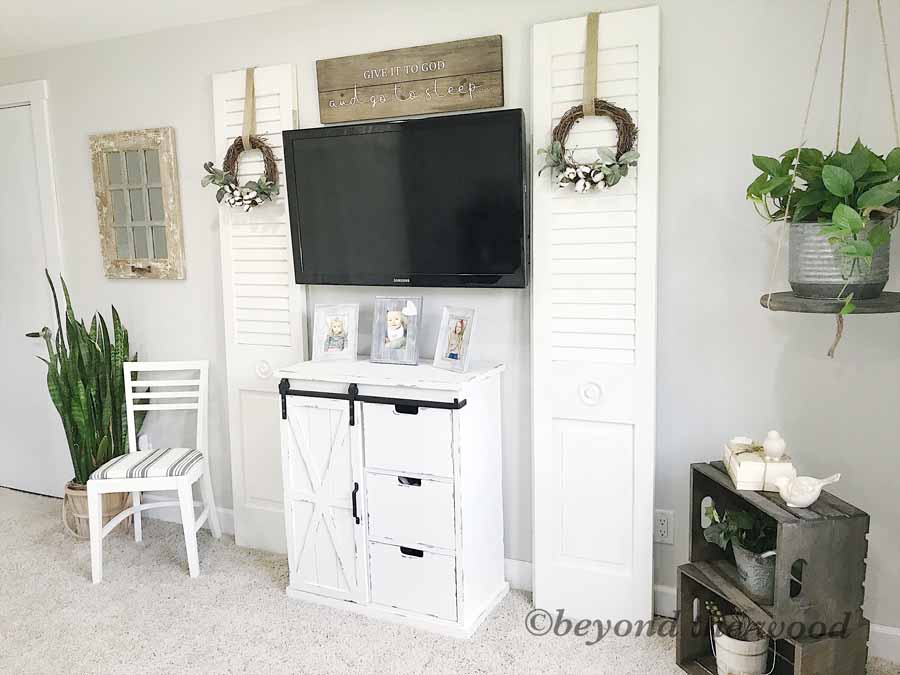
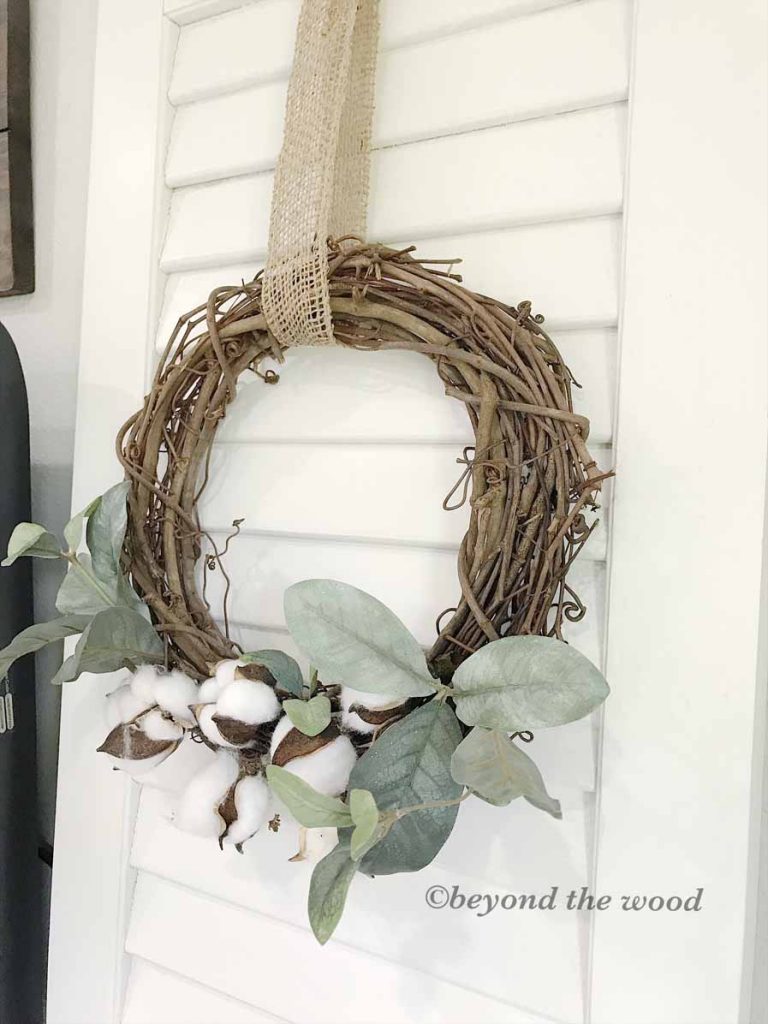
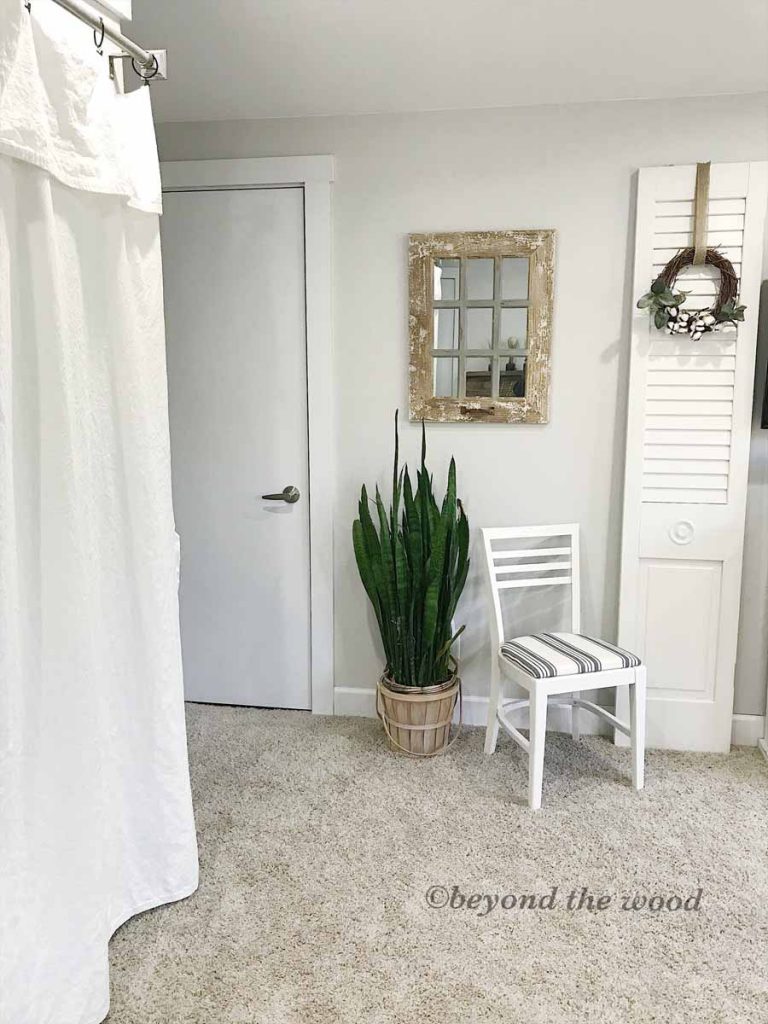
How about them bifold doors I pulled from my she shed! They turned out so cute. Adding the wreaths were the perfect touch! If you remember in the before photo the cords from the TV were hiding behind a crate on the dresser. Well now I have the cords all running behind the bifold door on the right. Such a great way to hide cords when you don’t want to drill into the wall to hide them. I have a little hook back there and the cords just hook on that and run down.
The chair will be going with my dressing table/vanity once that gets done but for now its great to sit down and put on socks. lol
That sign is one of my favorites! I see each each night I go to bed. Many of you have asked for the same one and I am working on them and should be done very soon! Thank you for those orders!

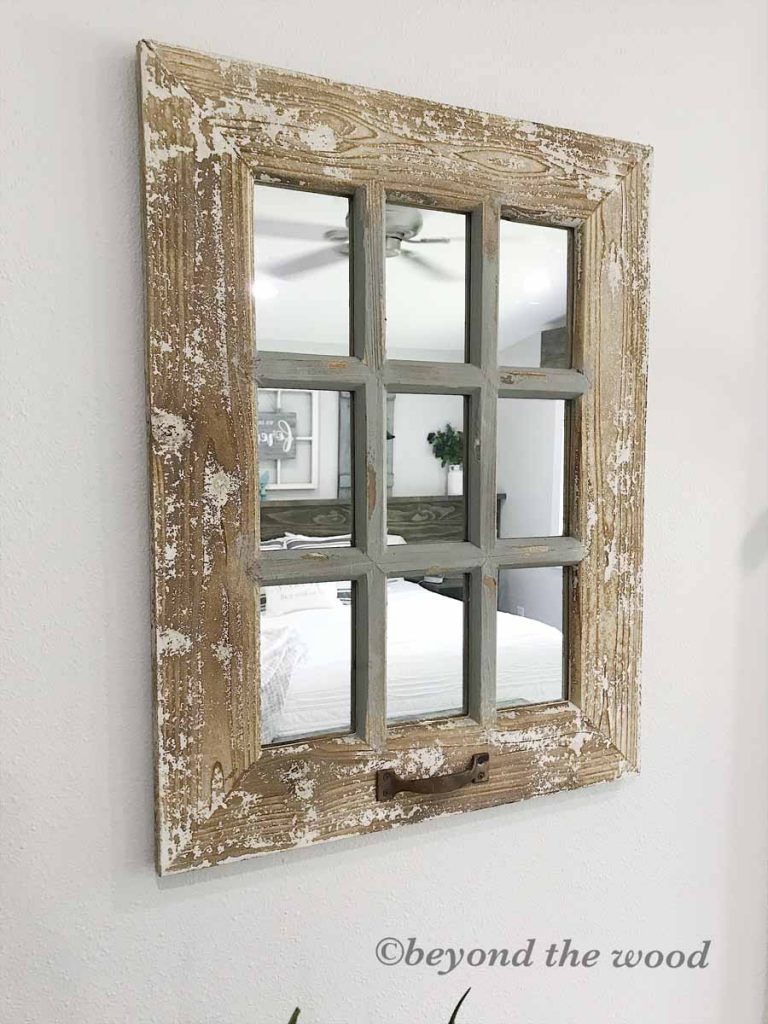
Love this chippy mirror!

See how cute the hanging table worked in this space? Of course me and crates….had to add some in here as well, lol!
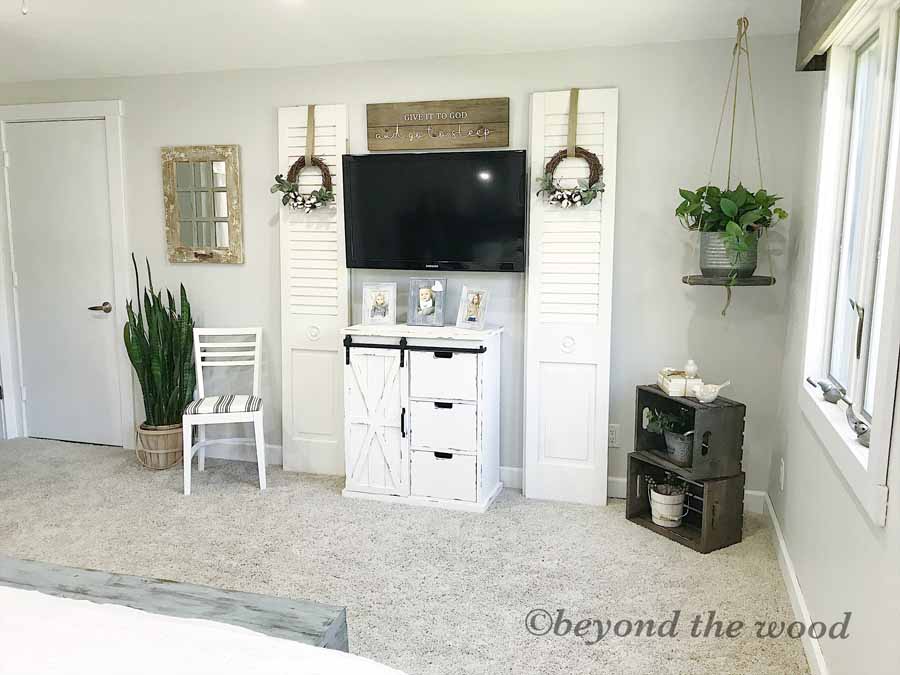
The bench at the back of the bed I did make many years ago but it also got a face lift to match the shutters. I always have to keep something at the back of the bed so my fur baby can jump up to go to bed. 🙂 This piece also has great storage.
On the closet doors I did go with drop cloth curtains but I bleached them so they would be white. If you remember in an earlier post I also have them in my office here. But those I kept the natural color. I am in the process of adding a new rod and another panel to the curtains. I will share all that in another post but I love how they turned out!
So there ya go my friends! I hope you enjoyed following along with this makeover and it gave you some inspiration.
My daughter was over the other day and asked what the next project was and it is the hallways upstairs need paint. So I will be slowly doing them as time permits.
But I have many other projects up my sleeve so be sure to keep following along! More tips, tricks and DIY coming soon!
If you have any questions or comments please feel free to comment below. I truly appreciate you stopping by the blog today.


I absolutely LOVE it. You are so talented. What a difference it made. Totally brightened up the room. I just love everything about it.
Awww thank you. We are very pleased with it and yes it is so bright in there I just love the difference! Thank you for your kind words!
Great job Tammy! Looks awesome 💖 Modern country is so warm and inviting. I am having Scott make a headboard, but I do like the built in shelves instead of night stands. Can you please have him check yours out when he is there please. I love yours, but I want it taller. I Wish your brother was so open to change lol I don’t think he’s got that gene, 🤔 but we will keep trying ♥️ Maybe you can inspire him when he gets there 🙏🏼 – hugs 🤗
Well thank you so much. Building is for sure the way to go if you are able to do it and Scott certainly could knock one out with ease. Your ideas sound super cute. I do like change and keeping up with design but also trying to do it on a budget can be challenging. But I always manage some how which makes me happy! Have a great rest of your day!
Tammy you are so talented!! Your bedroom is beautiful as is your whole house you have a great eye for
design! You should become a home designer I would hire you instantly!
Awww you are so sweet thank you. I would have loved to have gone into home design in my earlier years but never did. Just to busy raising babies. But now it is a great hobby I enjoy! Thank you for your sweet words!
LOVE everything about it! It is bright and cheery yet warm and inviting at the same time.
Thank you so much Sue. I do find myself just sitting in there from time to time enjoying the brightness. One day the newness will wear off but for now I will soak it up! Enjoy the rest of your day!
Your room turned out absolutely beautiful! Each detail is perfect and everything flows and coordinates so lovely. I am so happy I found your blog last month it is so inspiring and full of great tips. Thank you for sharing your ideas and home with us. I look so forward to your posts each week and wish there were more! 🙂
Thank you Samantha I appreciate it. I would love to blog more but time is always against me, lol. But I have many ideas and will continue to share as often as I can. I am so happy you are finding inspiration from it as that is my goal! I hope you have a great rest of your day!
Wow. Spectacular! Love the look. Great makeover!
Thank you Janean! It was a fun project and always anxious to complete when you have a vision and on a mission! lol